

IP whitelisting is required for both the sandbox (test) and production environments. You configure it as a two-factor authentication (2FA) method in the Merchant Dashboard.
Prerequisites
Before you whitelist an IP address, ensure the following:- You have generated Secure ID API credentials. Secure ID client IDs typically start with
CF. Use Secure ID credentials, not Payment Gateway keys. - You have a public IPv4 address. Cashfree does not support IPv6, CIDR ranges such as
/24, or private IP addresses, including the10.x.x.x,172.16.x.xto172.31.x.x, and192.168.x.xranges. Whitelist only individual IPv4 addresses. - You plan to whitelist no more than 25 IP addresses.
- If your service uses dynamic or range-based outbound IP addresses, for example Render, IP whitelisting may not be feasible. Use the Signature Generation (Public Key) method instead.
- Log in to the Merchant Dashboard.
- Select the apps icon (nine dots), then select Secure ID.
- Select Switch to Test for sandbox credentials, or stay in production for live credentials.
- Go to Developers > Two-Factor Authentication and create the API key.
Whitelist an IP address
To whitelist your IP address, follow these steps:- Log in to the Merchant Dashboard.
- Go to Developers > Two-Factor Authentication under the Secure ID card.
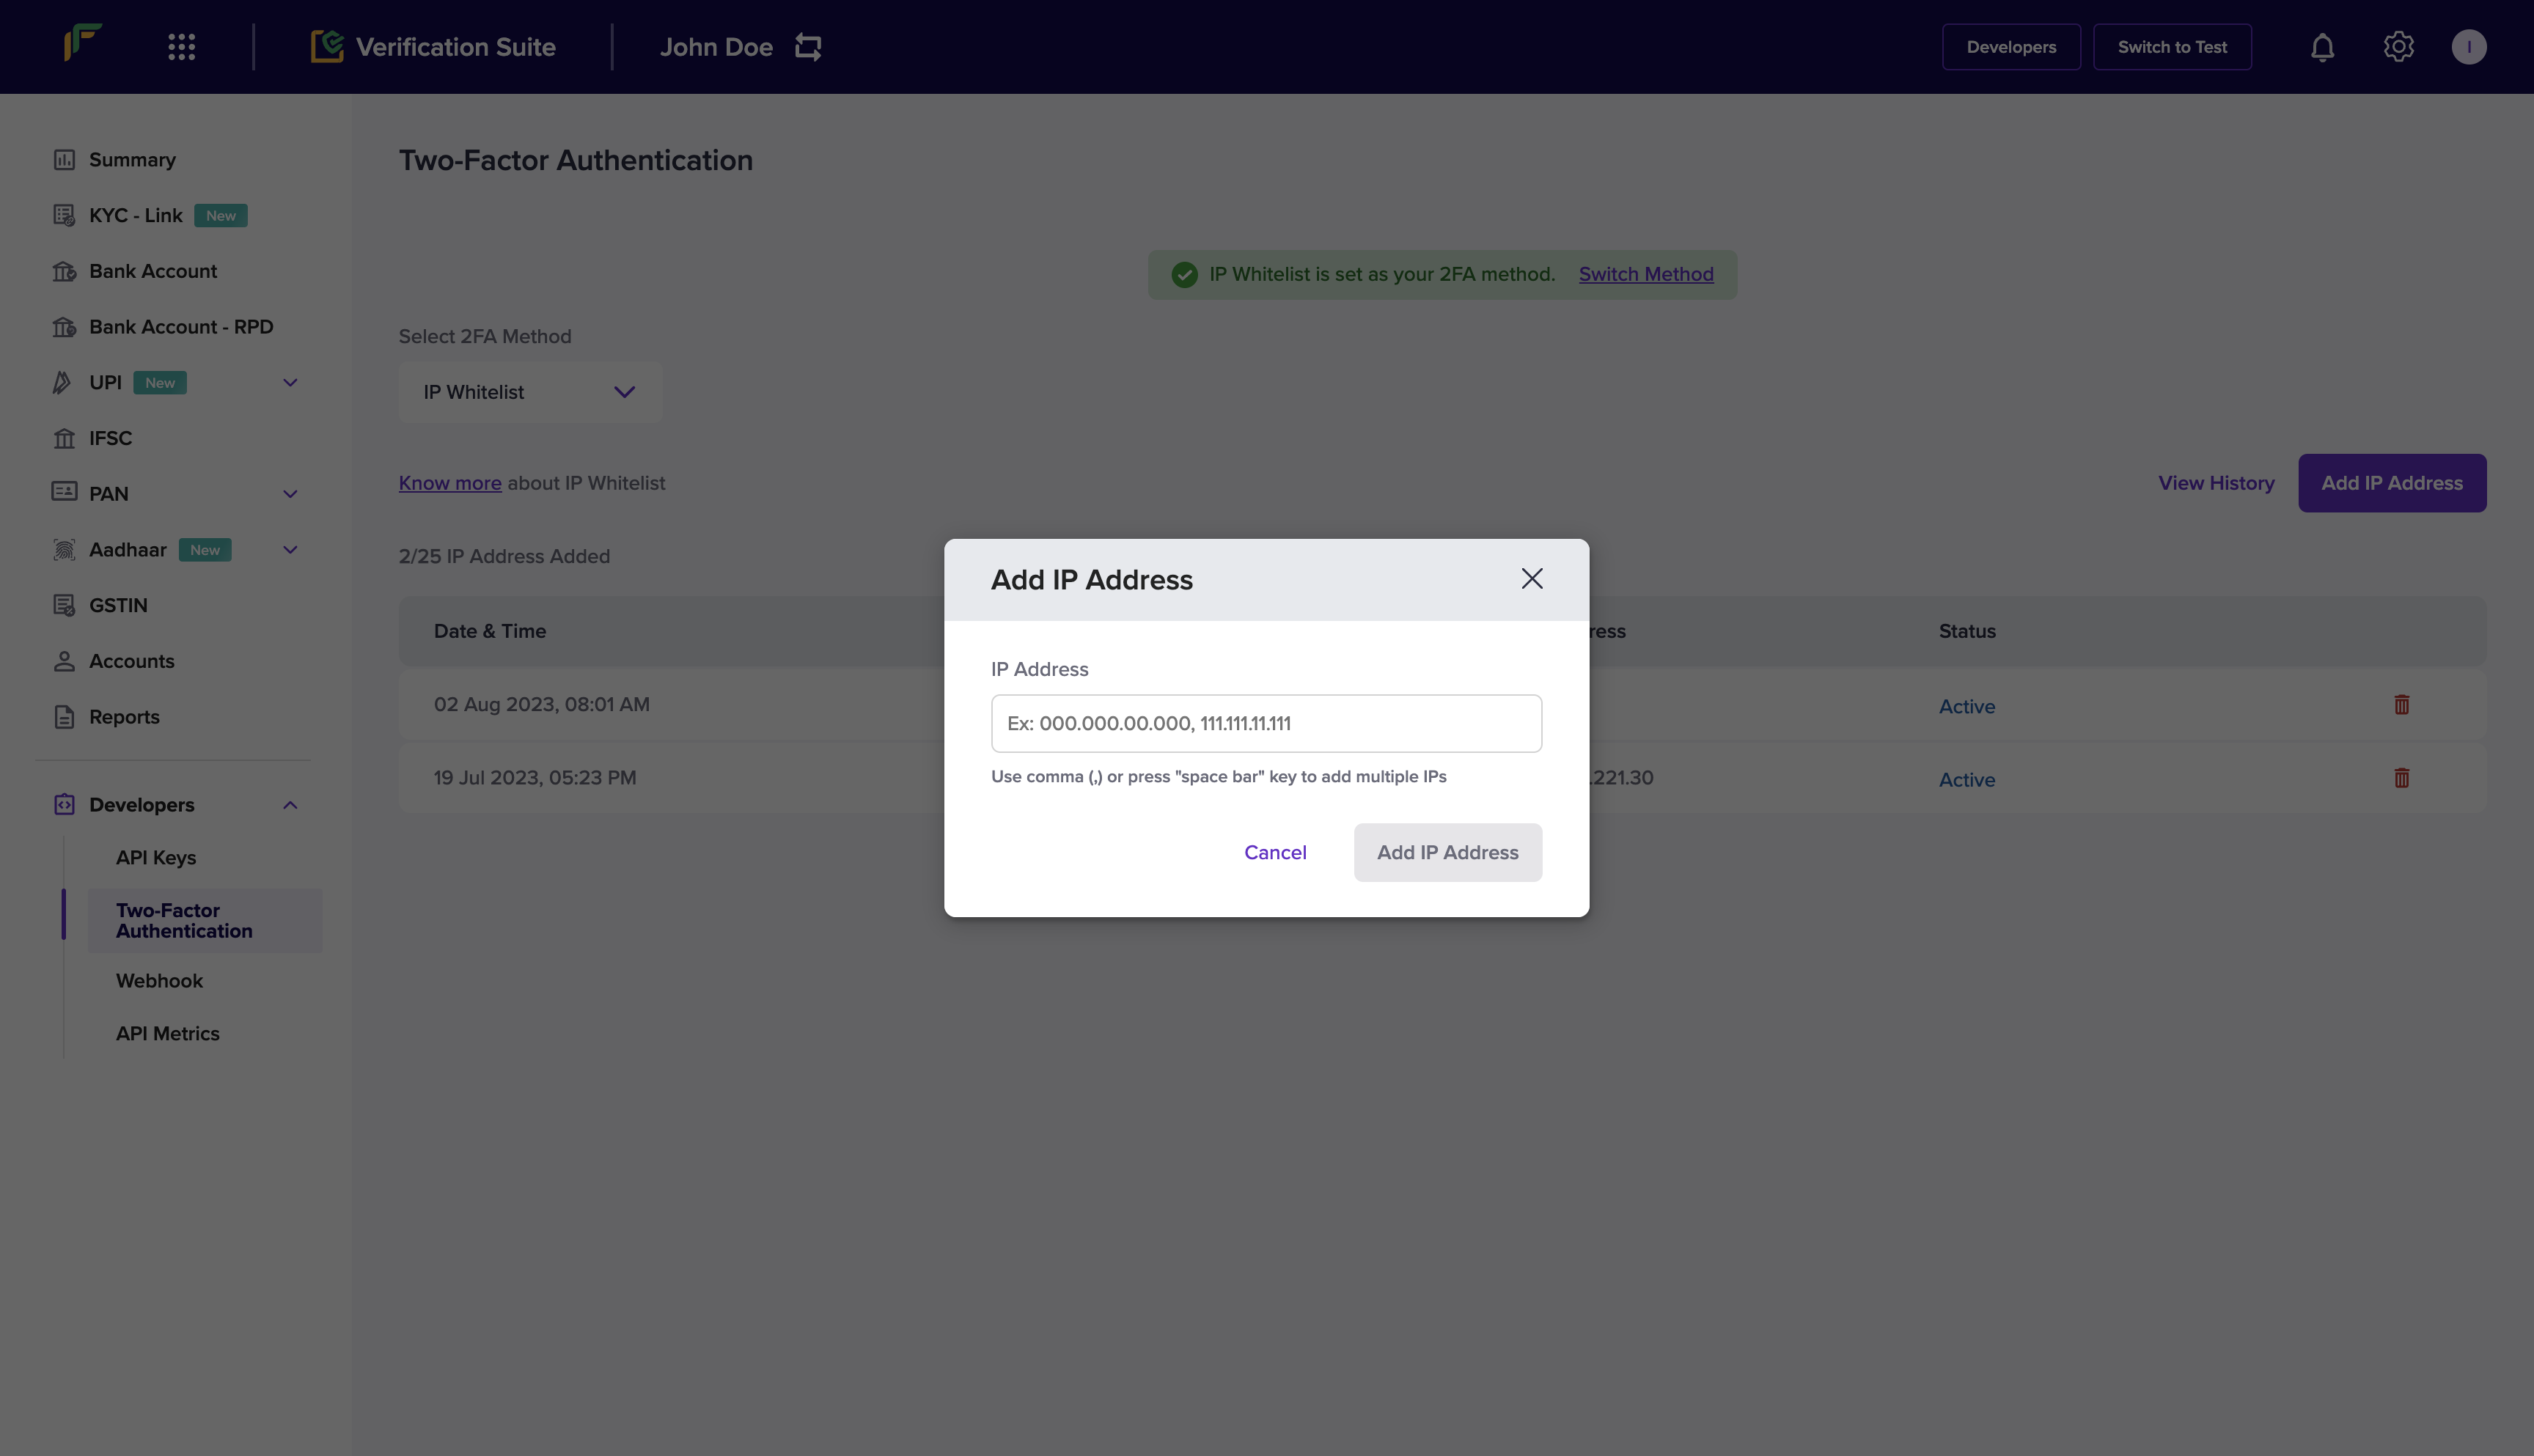
- Select IP Whitelist from the Select 2FA Method drop-down.
- Select Add IP Address.
- Enter the IP address you want to whitelist and select Add IP Address to save.
Switch between 2FA methods
Complete these steps to change the active two-factor authentication method:- Log in to the Merchant Dashboard.
- Go to Developers > Two-Factor Authentication.
- Select Switch Method to toggle between IP Whitelisting and Public Key.
x-cf-signature header only when Public Key is the active method. Do not send x-cf-signature when IP Whitelisting is the active method.