Documentation Index
Fetch the complete documentation index at: https://www.cashfree.com/docs/llms.txt
Use this file to discover all available pages before exploring further.
IP whitelist
The IP of the system from which you make your request has to be whitelisted to connect with the Cashfree Payments production server. If the IP is not whitelisted, Cashfree Payments will reject all incoming requests. To whitelist your IP,- Log in to the Merchant Dashboard.
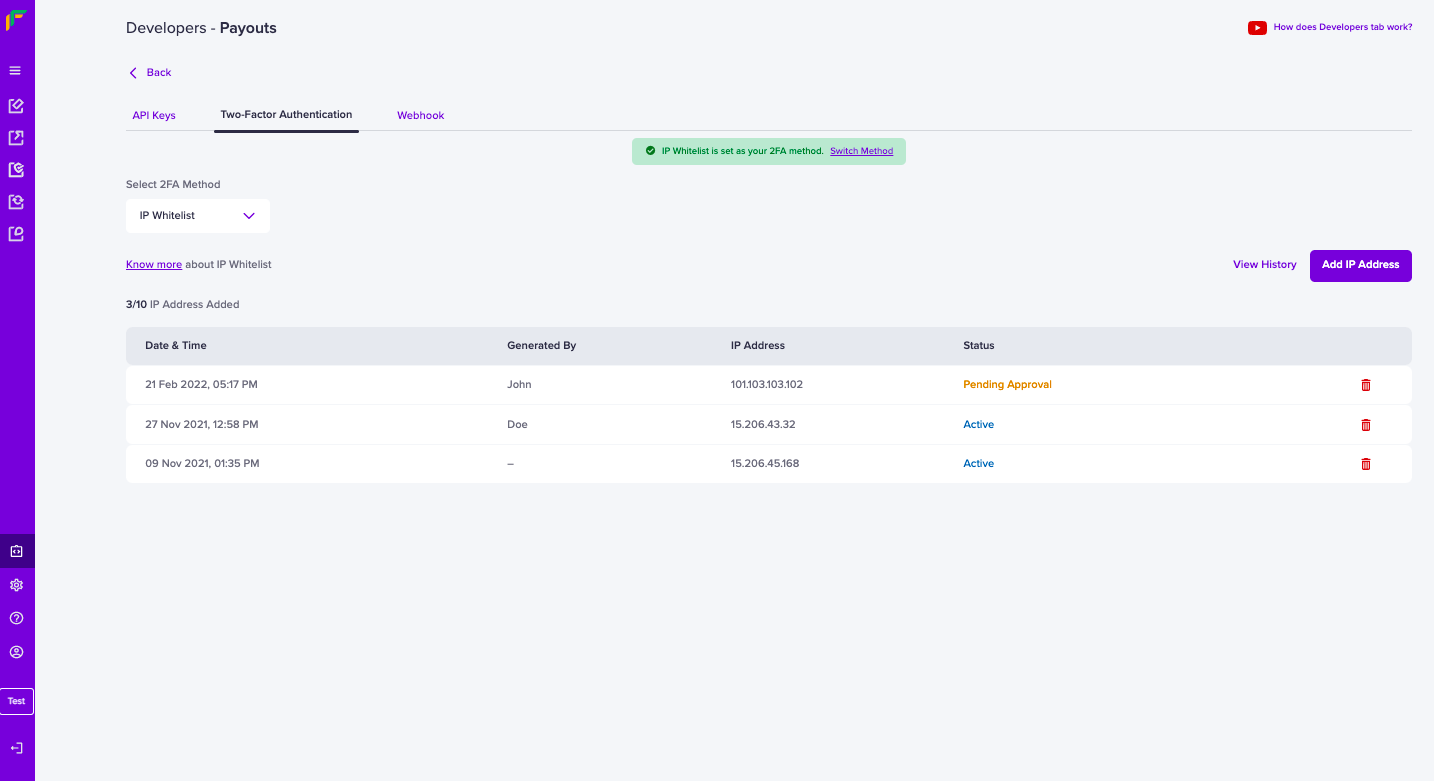
- Go to Payouts Dashboard > Developers section on the left-side navigation > Payouts > Two-Factor Authentication > IP Whitelist.
- Click Add IP Address.
- Enter the IP Address you want to whitelist and save the details. All the IP’s you have whitelisted will be displayed as shown below. You can whitelist a maximum of 10 IPs.
Depending on your operating system, you can retrieve the IP of the system via
multiple methods. You can also find your IP using helper sites such as
https://whatismyipaddress.com/
Please note that the IPv4 has to be whitelisted, not IPv6.
Please note that the IPv4 has to be whitelisted, not IPv6.
Public key
If you do not have a static IP, you can generate a public key and pass it with the API request.Note: A password is not required to access the public key in the test environment.
- Log in to the Merchant Dashboard.
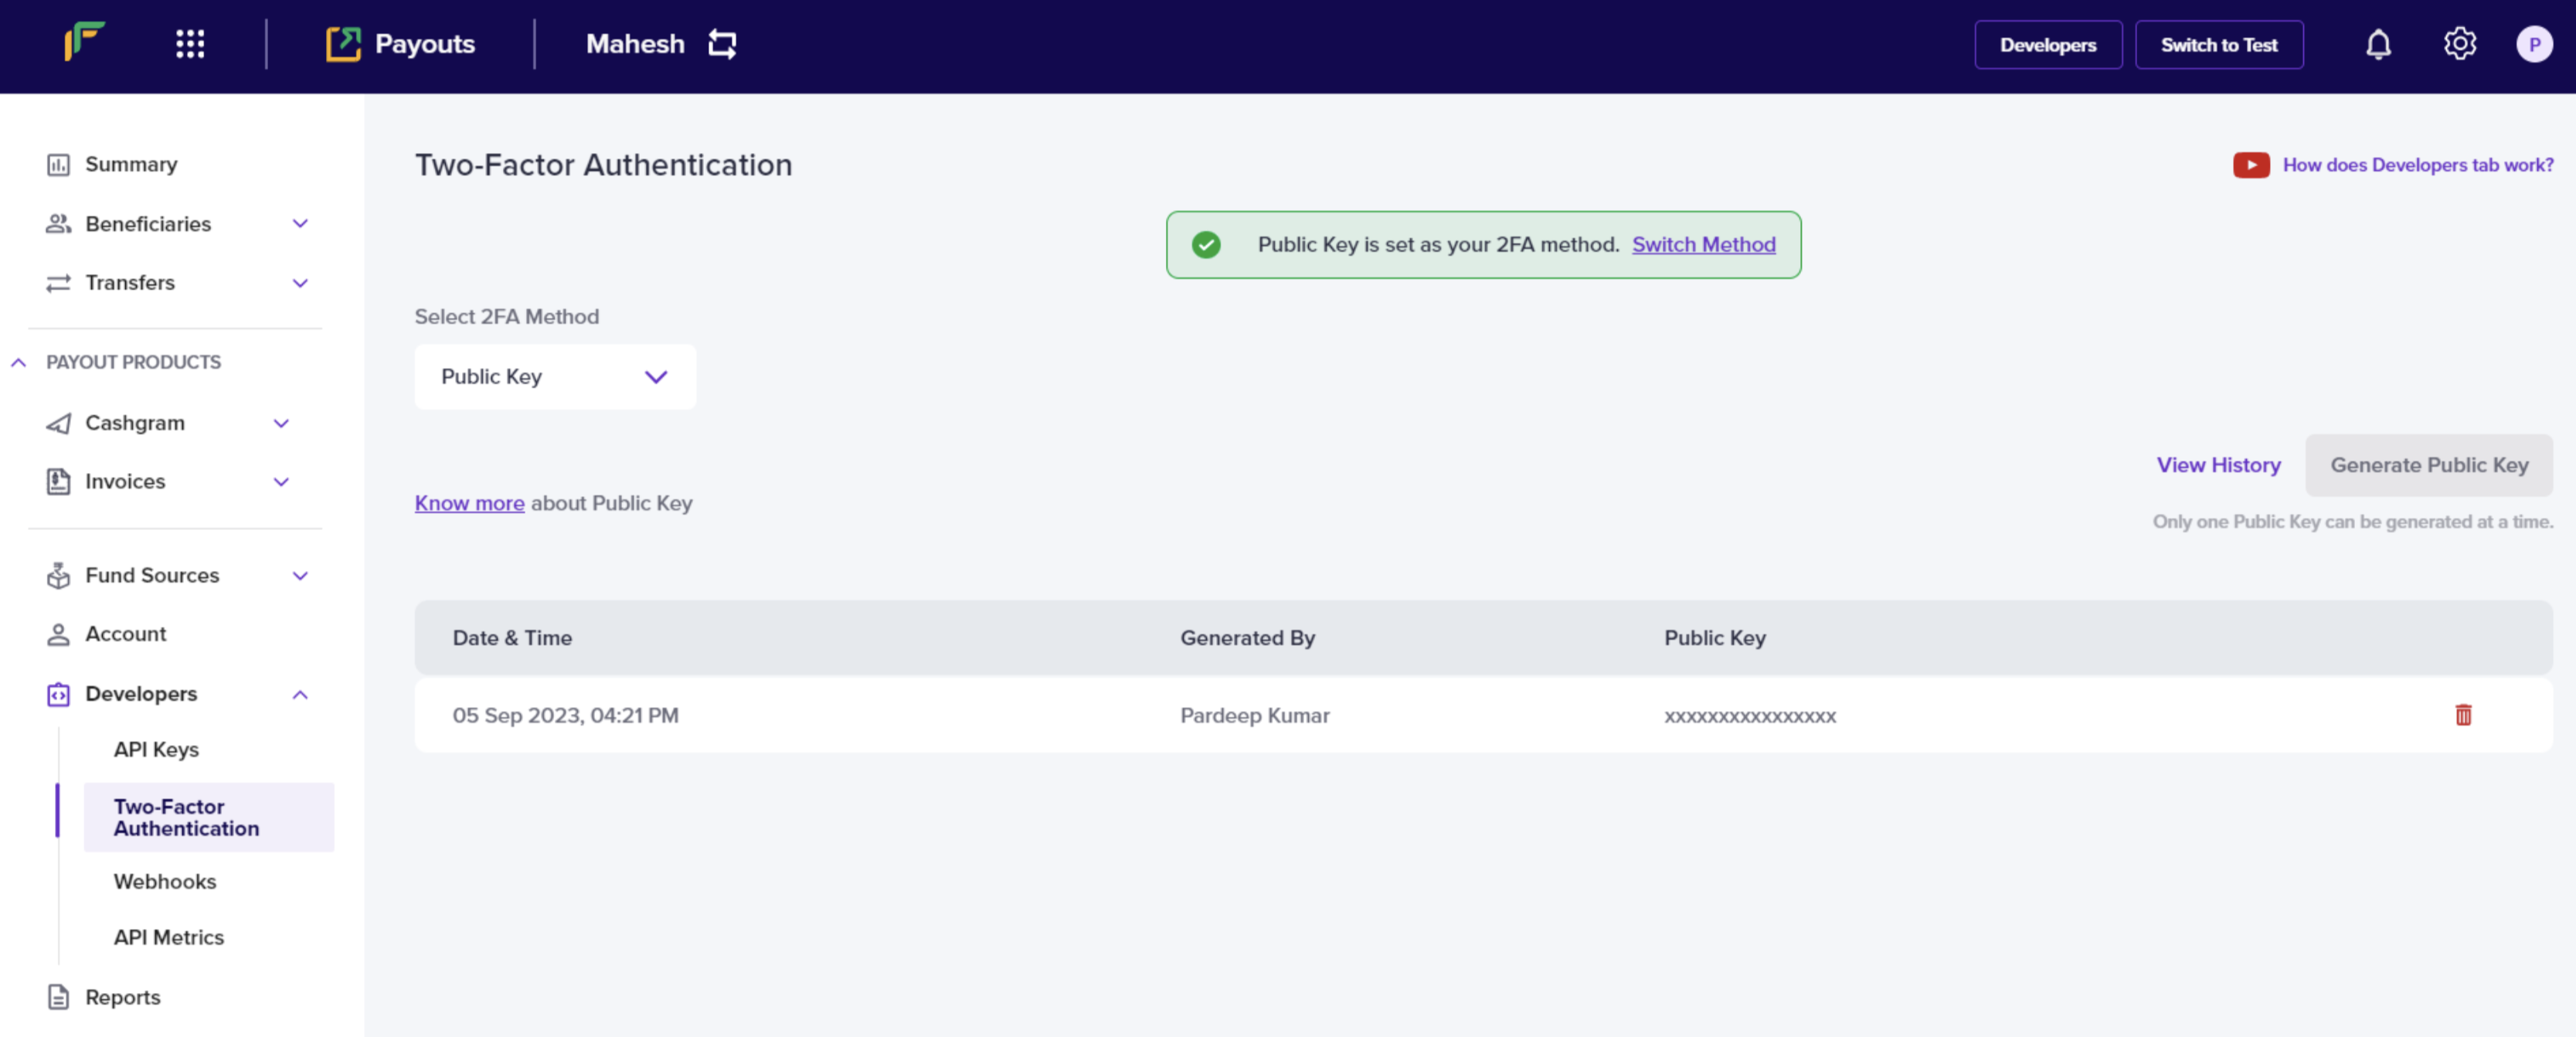
- Go to Payouts Dashboard > Developers section on the left-side navigation > Payouts > Two-Factor Authentication > Public Key.
- Click Generate Public Key. The public key will be downloaded to your computer and the password to access it will be your email ID registered with Cashfree Payments. Only one public key can be generated at a time.
- Retrieve your clientId (one which you are passing through the header X-Client-Id )
- Append this with CURRENT UNIX timestamp separated by a period (.)
- Encrypt this data using RSA encrypt with Public key you received – this is the signature.
- Pass this signature through the header X-Cf-Signature.
Note: The generated signature expires after 10 minutes. A new signature must be generated every 10 minutes.
FAQs
Why do I have to whitelist the IP address or generate a public key?
Why do I have to whitelist the IP address or generate a public key?
Whitelisting the IP address or generating a public key provides a layer of authentication. These cybersecurity techniques prevent anonymous or unknown disbursement requests and allow only verified requests.
What is an IP address?
What is an IP address?
A string of characters that identifies each computer using the Internet Protocol to communicate over a network. Computers use IP addresses to communicate with each other over the internet.
What does it mean to whitelist an IP?
What does it mean to whitelist an IP?
Whitelisted IPs are an index of approved entities. A whitelist approves a list of email addresses, IP addresses for communication.
What happens after I whitelist my IP address?
What happens after I whitelist my IP address?
The Cashfree Payments production server allows your API requests.
How many IP addresses can I whitelist?
How many IP addresses can I whitelist?
You can whitelist a maximum of 25 IP addresses.
Does Cashfree Payments support IPv6?
Does Cashfree Payments support IPv6?
No, we only support API requests from IPv4 at the moment.
Why does an IP whitelisting error occur even after whitelisting an IP, and how can it be resolved?
Why does an IP whitelisting error occur even after whitelisting an IP, and how can it be resolved?
An IP whitelisting error can occur if multiple Payout accounts exist and the IP address is whitelisted only on one account, but the API keys in use belong to a different account. To resolve this, whitelist the IP address on all Payout accounts and ensure the correct set of API keys is used for the intended account. Switching to the appropriate account usually fixes the issue and prevents further authentication errors.
When do I use a public key?
When do I use a public key?
If your IP address is not static, generate a public key in the Cashfree Payments portal.
How to generate a public key from the Cashfree Payments portal?
How to generate a public key from the Cashfree Payments portal?
- In the Cashfree Payments dashboard, select Developers from the navigation panel on the left.
- Click Two-Factor Authentication from the Payouts card.
- Select Public Key from the Select 2FA Method dropdown menu.
- Click Generate Public Key.
-
The public key is downloaded to your computer. Use your registered email ID to access the key.
How many public keys can I generate at a time?
How many public keys can I generate at a time?
One. You can generate only 1 public key at a time.
How to use the public key to send API requests?
How to use the public key to send API requests?
You need to generate a signature and proceed with the API requests.Below are the steps to generate the signature:
- Retrieve your client ID.
- Append this with CURRENT UNIX timestamp separated by a period (.).
- Encrypt this data with the generated public key using RSA encryption - this is the signature.
- Pass this signature in the header X-CF-Signature.