Refunds return money from a successful payment to the customer. Understanding how to manage refunds efficiently helps maintain customer satisfaction and operational transparency. This guide helps you understand how to process and track refunds effectively through the Cashfree dashboard. This is useful to:
  • Process merchant-initiated and automatic refunds.
  • Track refund status and processing times.
  • Manage refund operations through the dashboard.
  • Troubleshoot common refund issues.

Quick reference

The following questions address common tasks and concerns when managing refunds through the Merchant Dashboard.
Cashfree supports two types of refunds to ensure seamless payment reversals for different scenarios.
  • Merchant-initiated refunds: Manual refunds initiated by the merchant from the dashboard or via API for customer service, order cancellations, or disputes.
  • Automatic refunds: When a transaction fails but the customer’s account is debited, Cashfree automatically initiates a refund without merchant intervention.
Most refunds (90%) are processed instantly regardless of payment method. Standard TAT applies only when bank delays occur.
Related topics: Learn more about refund APIs, refund webhooks, and refund error handling.
Refund processing times vary by payment method, though most are completed instantly. Complete processing times are:
  • UPI refunds: Up to 5 working days. This is usually processed within hours.
  • Card refunds: Up to 7 working days. This depends on the issuing bank.
  • Other payment methods: 7-10 working days for net banking and wallet transactions.
Processing time refers to the maximum TAT. Around 90% of refunds are processed instantly regardless of the payment method used.
Related topics: For detailed refund timelines, see refund processing, payment method specifics, and bank processing times.
You can process refunds directly from the Merchant Dashboard. Complete these steps to initiate a refund:
  1. Log in to the Merchant Dashboard.
  2. Go to Payment Gateway > Transactions > Payments.
  3. Search for the transaction to be refunded and click Refund.
  4. Enter refund details:
    • Enter refund amount (full or partial)
    • Add a remark if required
    • Click the info icon to view refund charges
  5. Click Initiate refund to process instantly.

Refund initiation process

The refund amount can’t exceed the maximum refundable amount. Refunds can also be initiated via API.
Related topics: For API-based refunds, see create refund API, refund status tracking, and bulk refund operations.
You can track refund status and view detailed information directly from the dashboard. Complete these steps to check refund status:
  1. Log in to the Merchant Dashboard.
  2. Go to Payment Gateway.
  3. Select Refunds > Initiated refunds.
  4. Apply date range, status, or amount filters as needed.
  5. Click the Refund ID to view complete refund information.

Refund status dashboard

The dashboard shows refund status as:
  • Pending: Refund initiated but not yet processed.
  • Successful: Refund completed and funds returned.
  • Failed: Refund couldn’t be processed.
Related topics: For programmatic status checking, see get refund status API, refund webhooks, and comprehensive refund reports.
If the refund isn’t processed within the standard TAT, follow these troubleshooting steps:
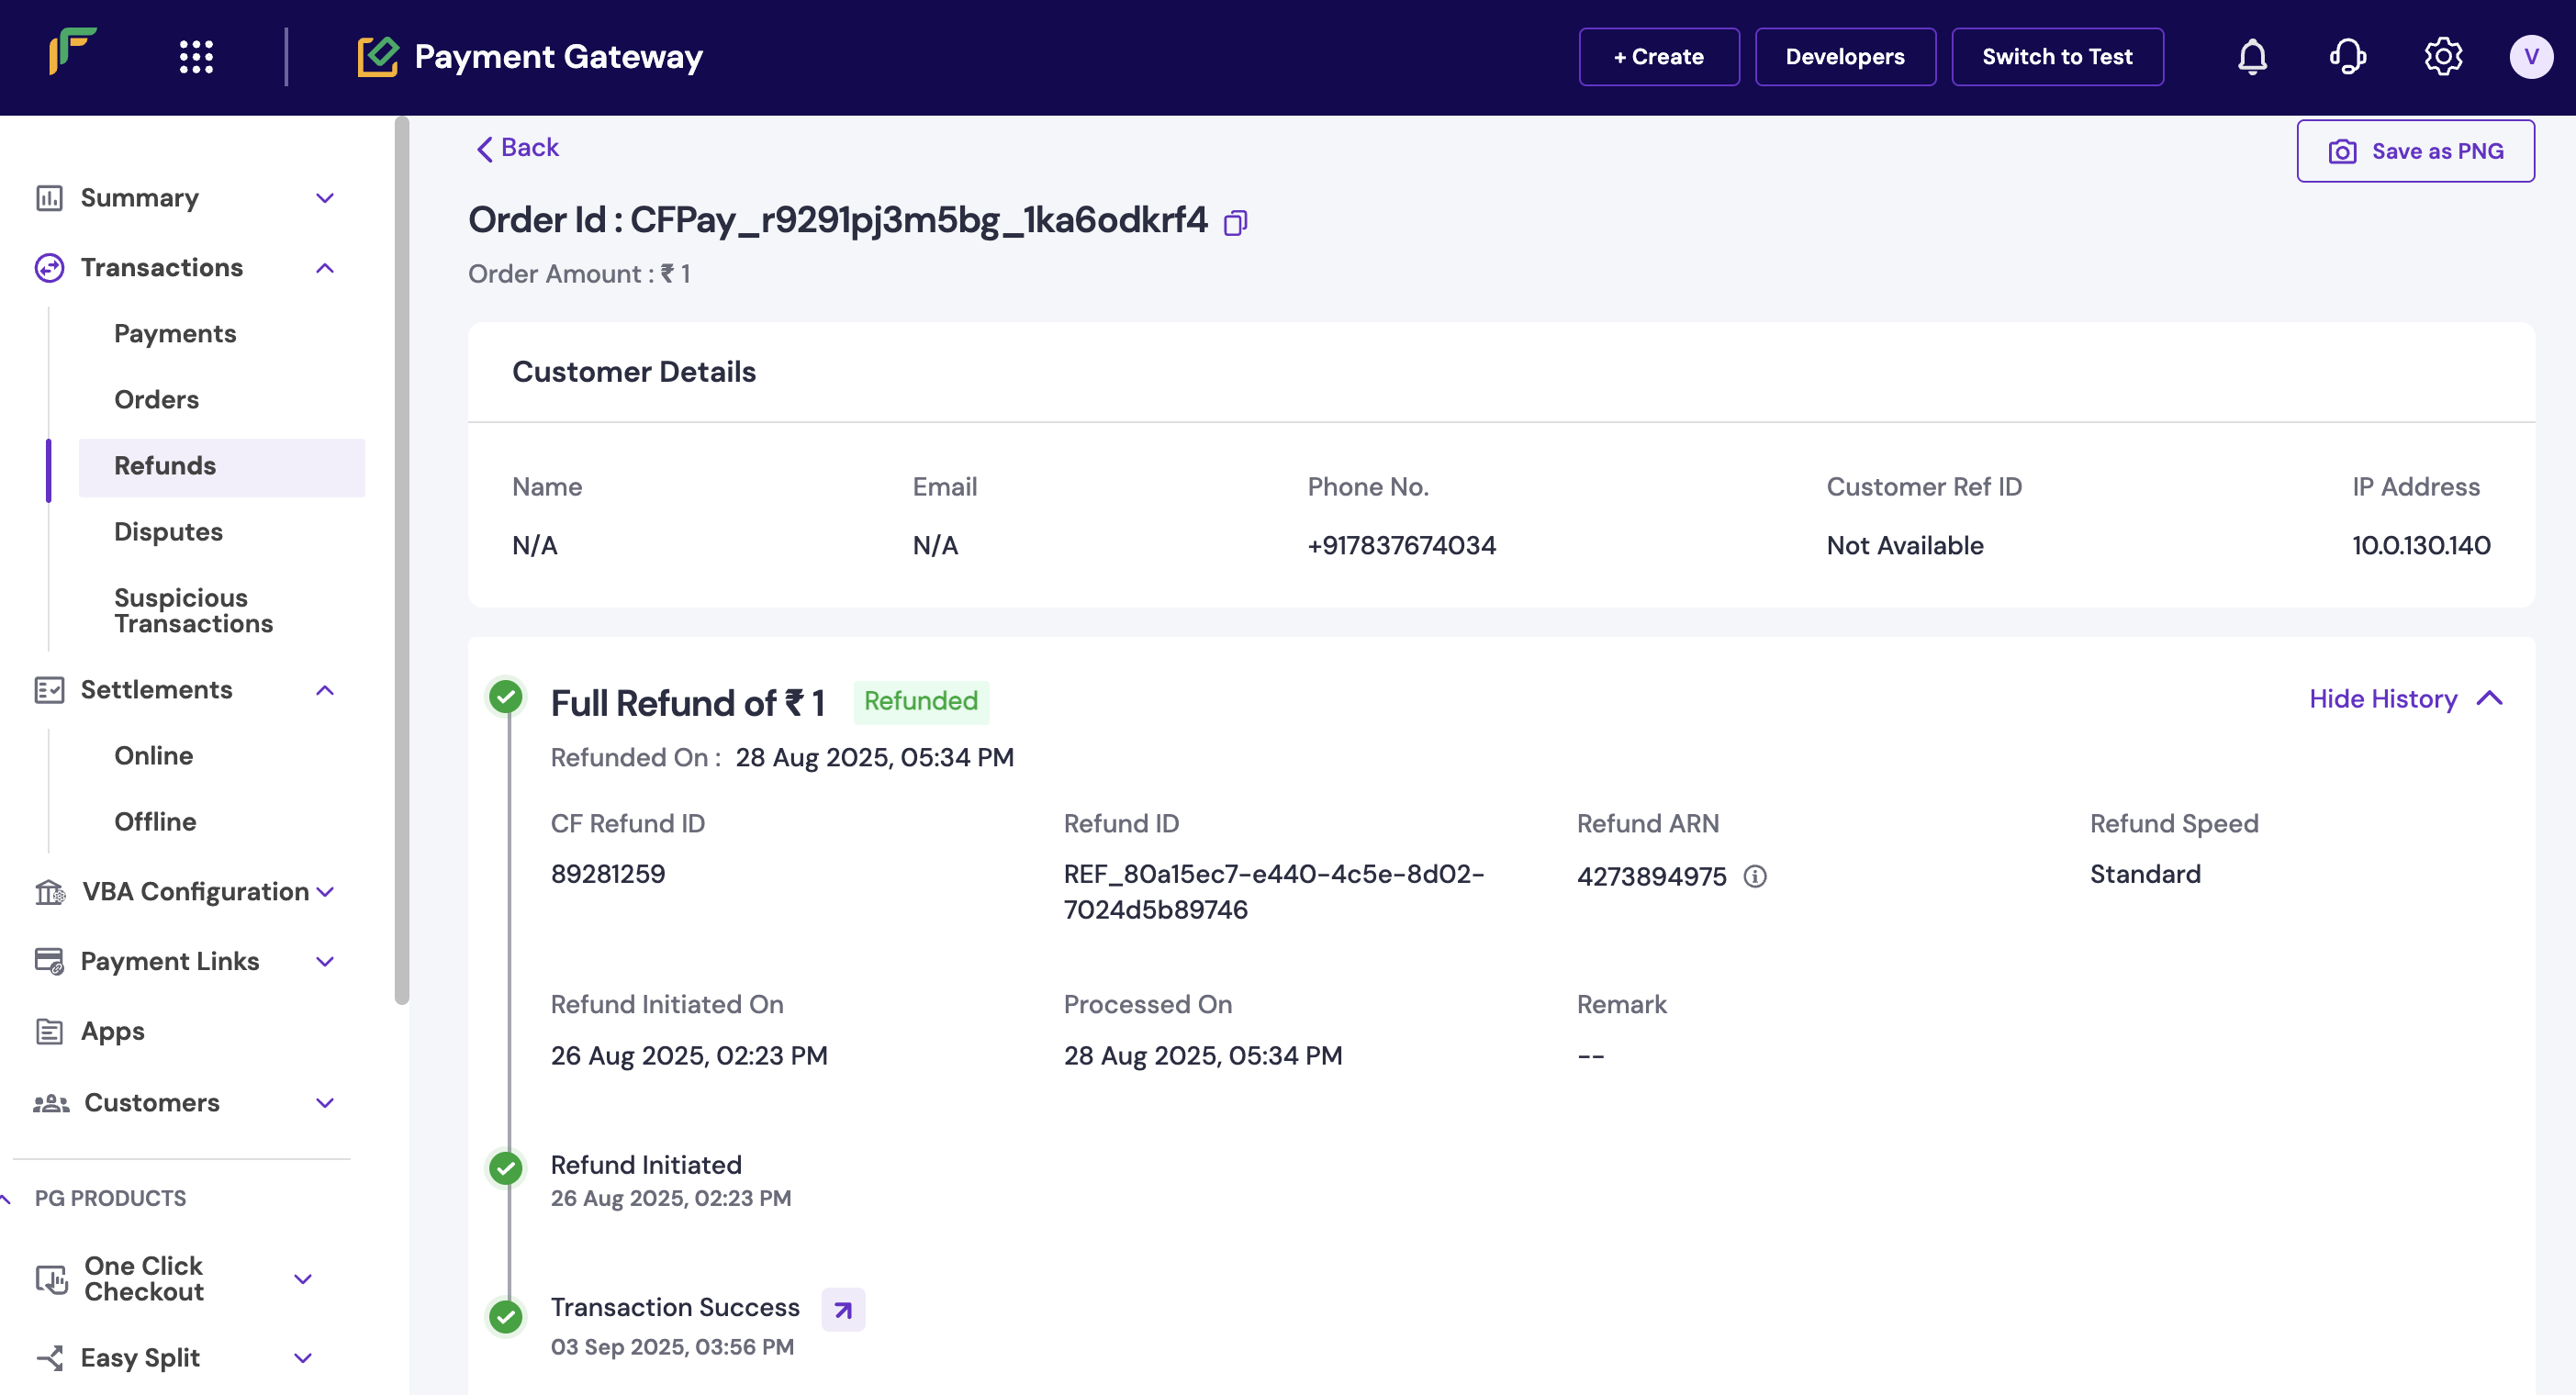
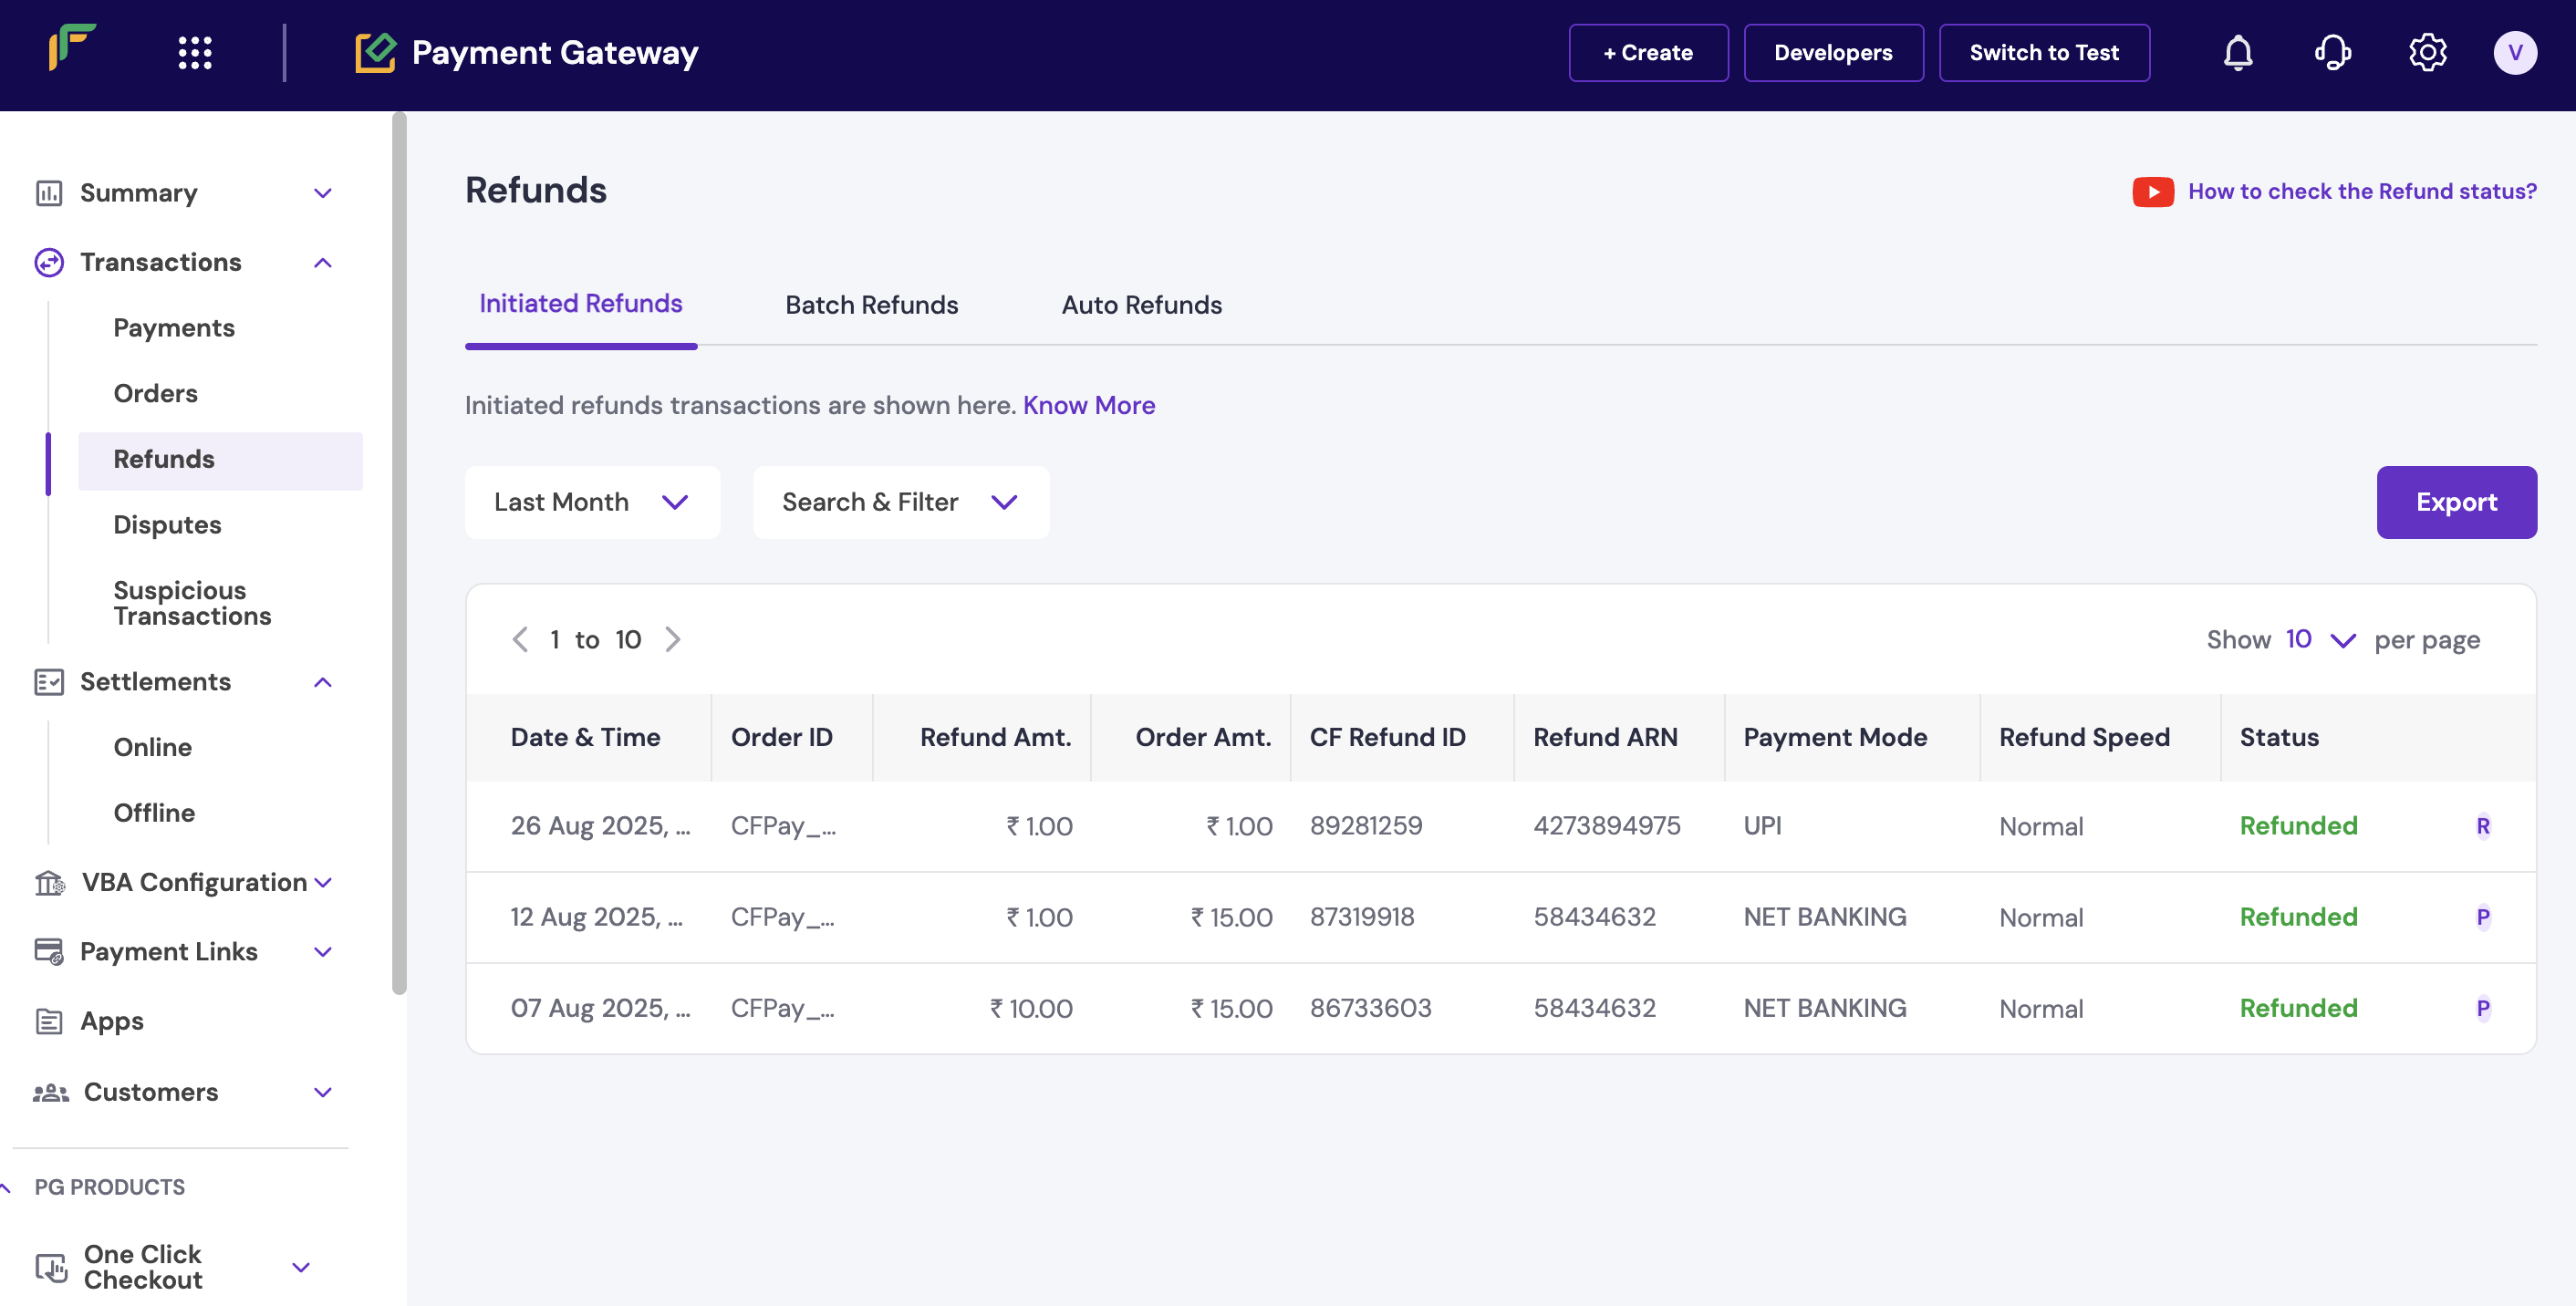
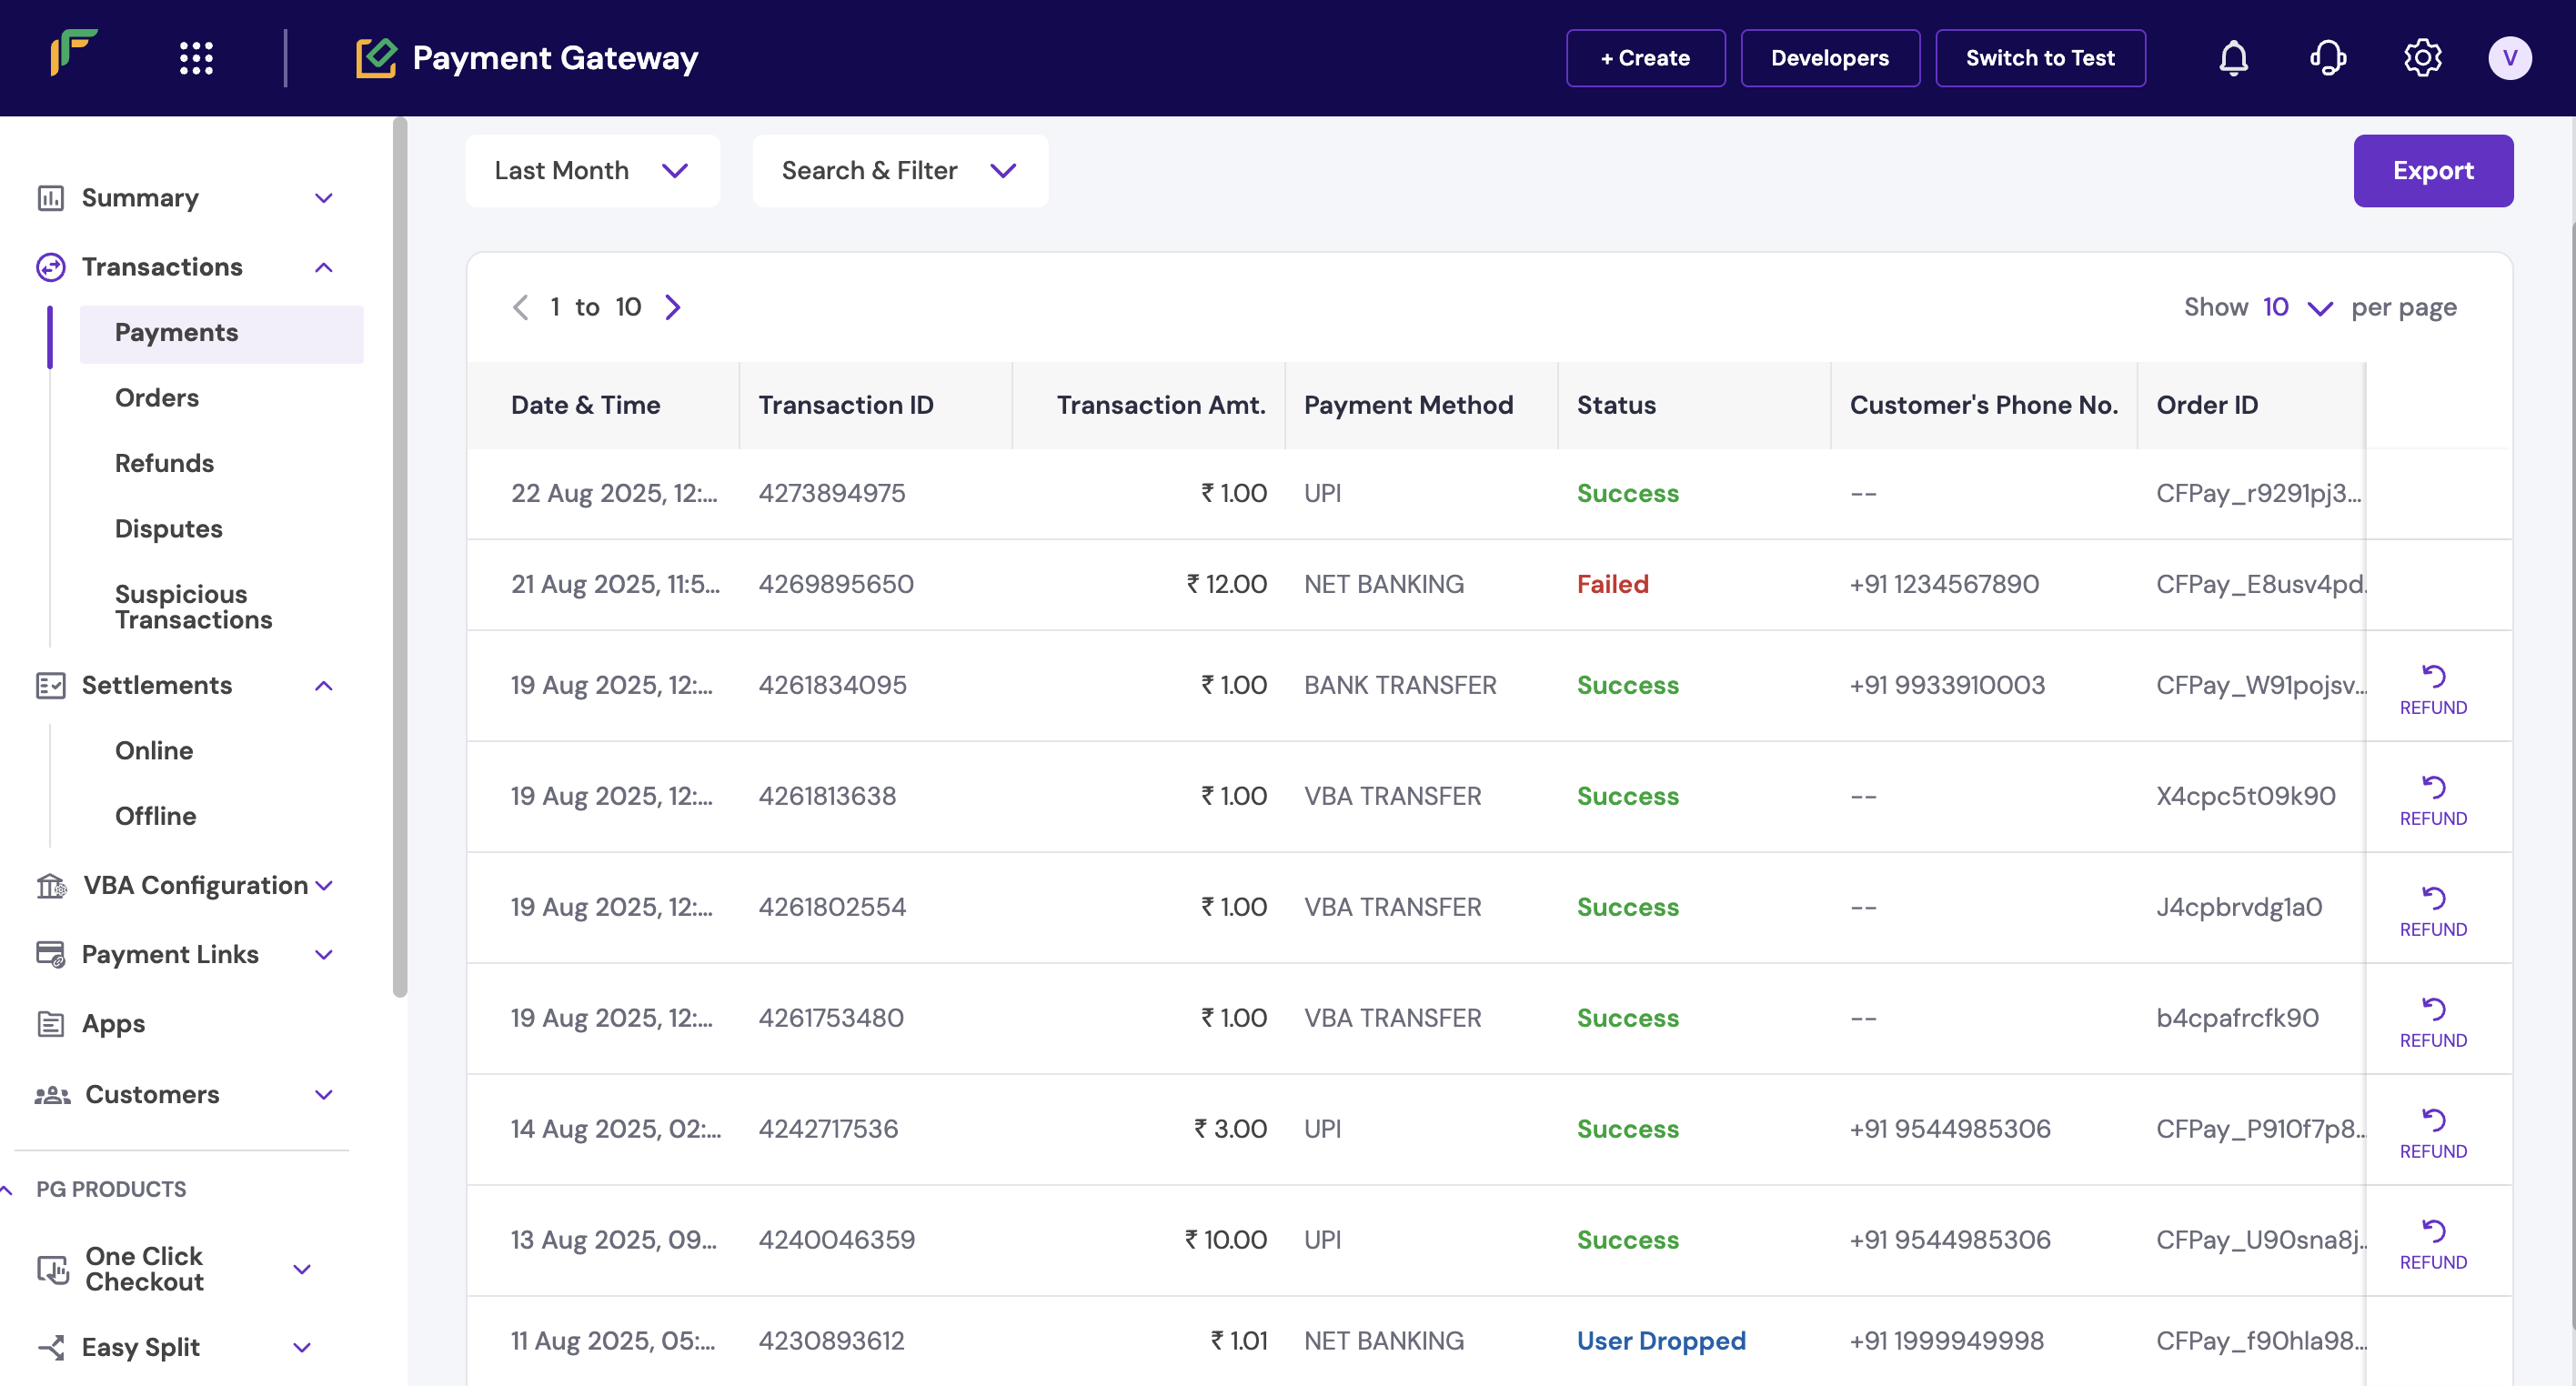
  1. Verify refund initiation: Check that the refund was initiated in Payment Gateway > Transactions > Refunds > Initiated refunds.
  2. Check refund status: Confirm if the status shows as pending or successful in the dashboard.
  3. Wait for TAT completion: If pending, wait for the respective TAT. UPI: 5 days, Cards: 7 days.
  4. Provide ARN for bank follow-up: If status shows success but the customer hasn’t received funds, provide the refund ARN (available in the Merchant Dashboard) for bank follow-up.
Most refund delays are due to bank processing times, not technical issues. Always check the refund status in the dashboard before escalating customer queries.
Related topics: For additional support, see refund troubleshooting, customer support guidelines, and dispute management.
Yes, you can cancel refunds that are still in pending status. Complete these steps to cancel a refund:
  1. Log in to the Merchant Dashboard.
  2. Go to Payment Gateway > Transactions > Payments.
  3. Locate the transaction with the refund you want to cancel.
  4. In the refund section, click the cancel option on the extreme right.

Cancel refund option

Refund cancellation is only available for pending refunds that haven’t been processed yet. Successful refunds can’t be cancelled.
Related topics: For API-based cancellation, see cancel refund operations, refund status management, and refund policy guidelines.

Next steps

After familiarising yourself with refund management basics: