Storefront setup
To add and verify a storefront collection point, complete the following steps:- Log in to the Merchant Dashboard.
- Navigate to PG PRODUCTS > Offline Payments > Collection Point Management.
-
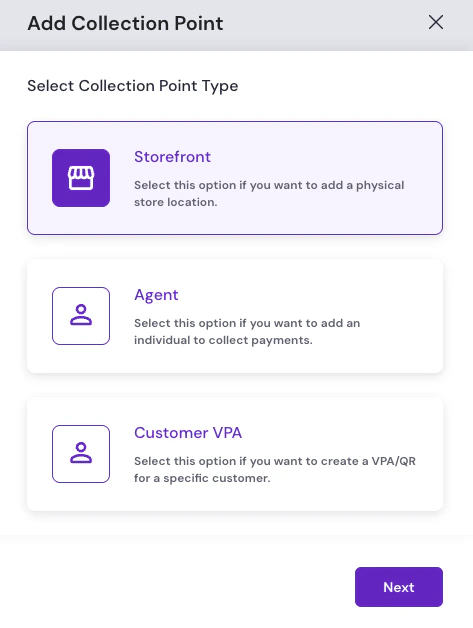
Click Add Collection Point, then select the Storefront collection type.
-
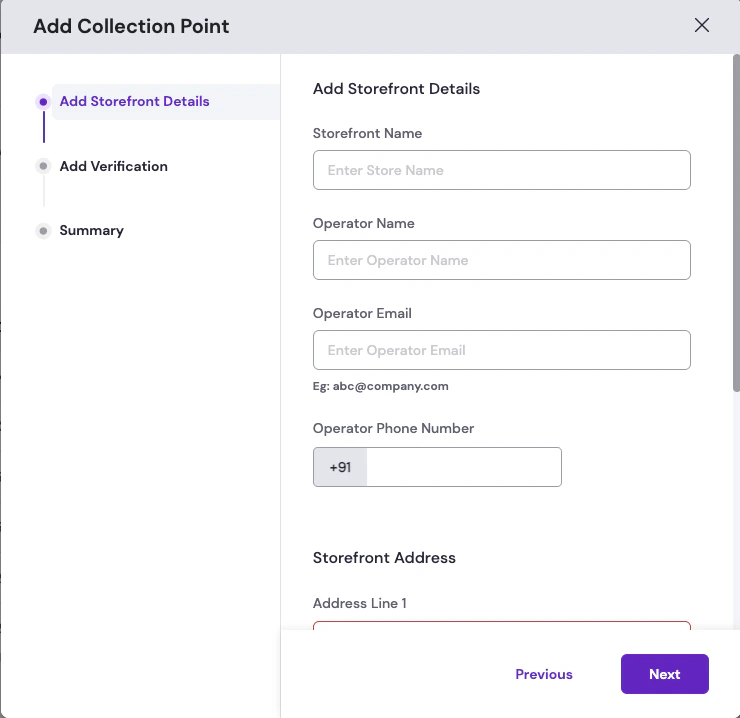
Provide the following details for the storefront:
- Storefront Name: The name of the physical store location.
- Operator Name: The name of the person operating the store.
- Operator Email: The operator’s email address.
- Operator Phone Number: The operator’s registered mobile number.
- Storefront Address: Full address including pin code and state.
-
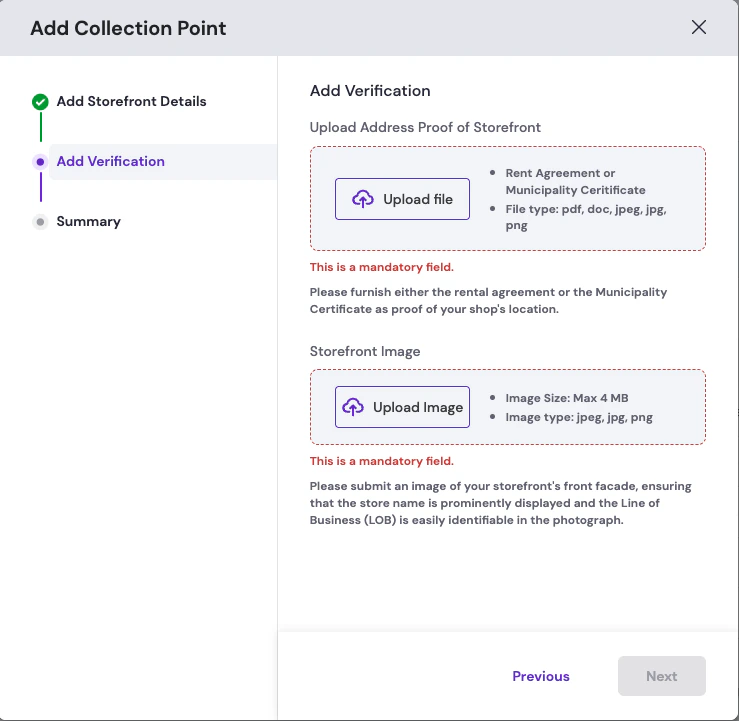
Add verification documents: Upload the following mandatory documents to complete the KYC.
-
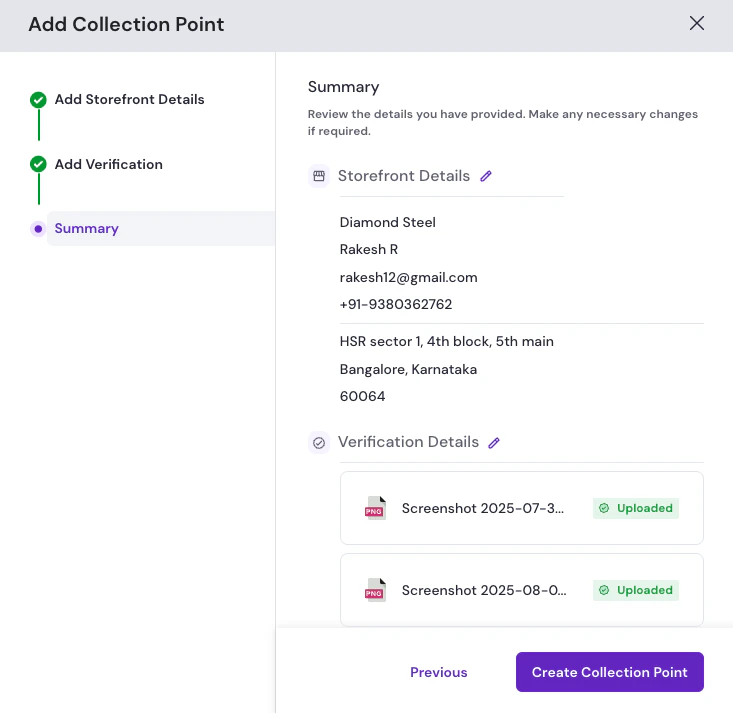
Summary: Review the storefront and verification details you have provided. Make any necessary changes to the storefront or verification details if required by selecting the edit icon next to the details. Click the Create Collection Point button to submit the details.
Agent setup
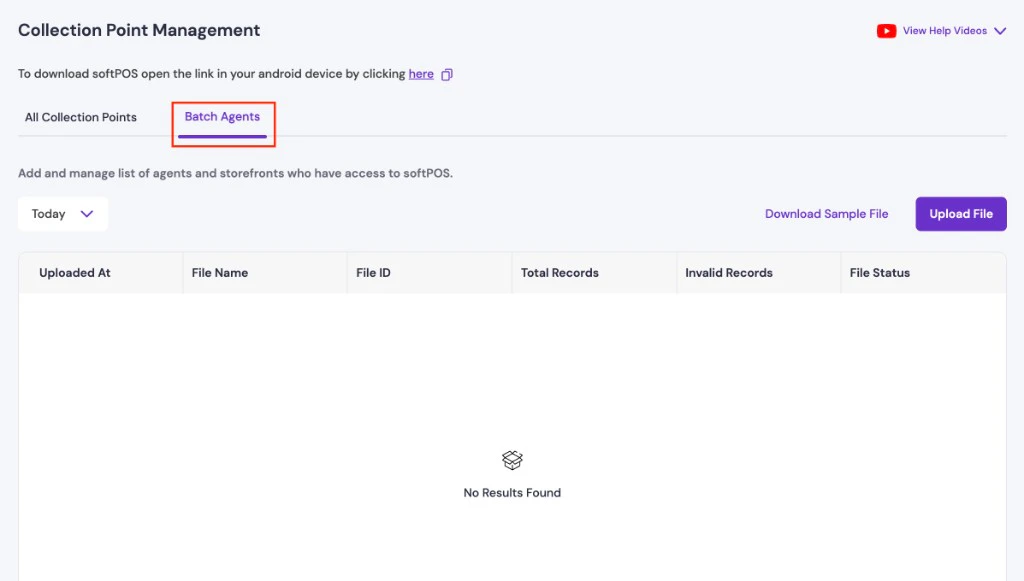
To add and verify an agent through KYC and onboard several agents at once using a batch file, complete the following steps:- Single agent
- Batch agents
To perform single-agent verification, complete the following steps:
- Log in to the Merchant Dashboard.
- Navigate to PG PRODUCTS > Offline Payments > Collection Point Management.
-
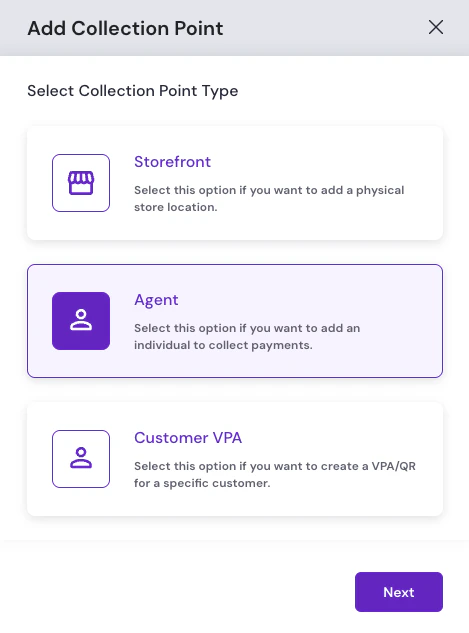
Click Add Collection Point, then select the Agent collection type.
-
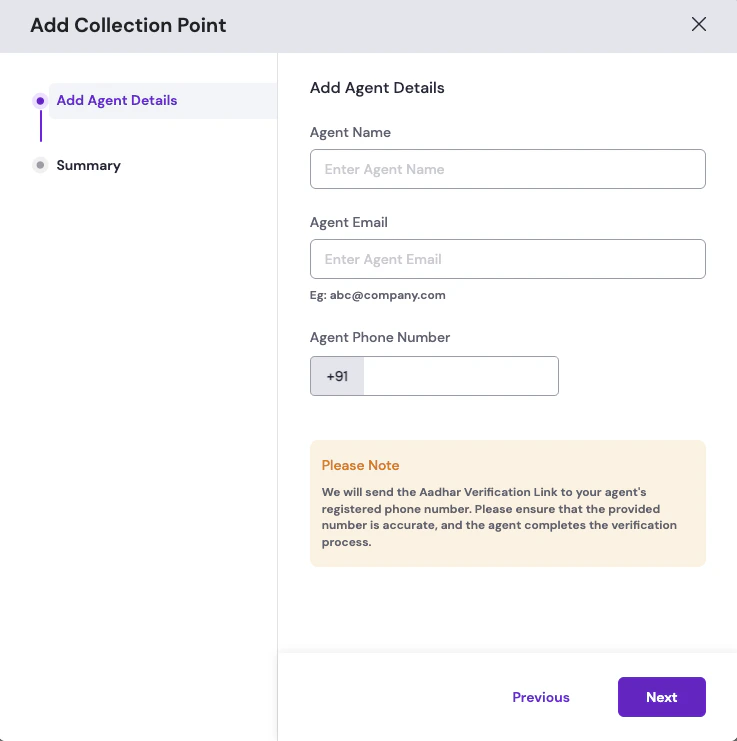
Provide the following mandatory agent details to initiate the verification:
- Agent Name: Full name of the agent as it should appear in the Merchant Dashboard and on KYC records.
- Agent Email: Valid email address that Cashfree uses for verification related communications with the agent.
- Agent Phone Number: Cashfree sends the Aadhaar verification link to this number. If this number is incorrect, the agent cannot complete verification until you correct it and resend the KYC SMS.
-
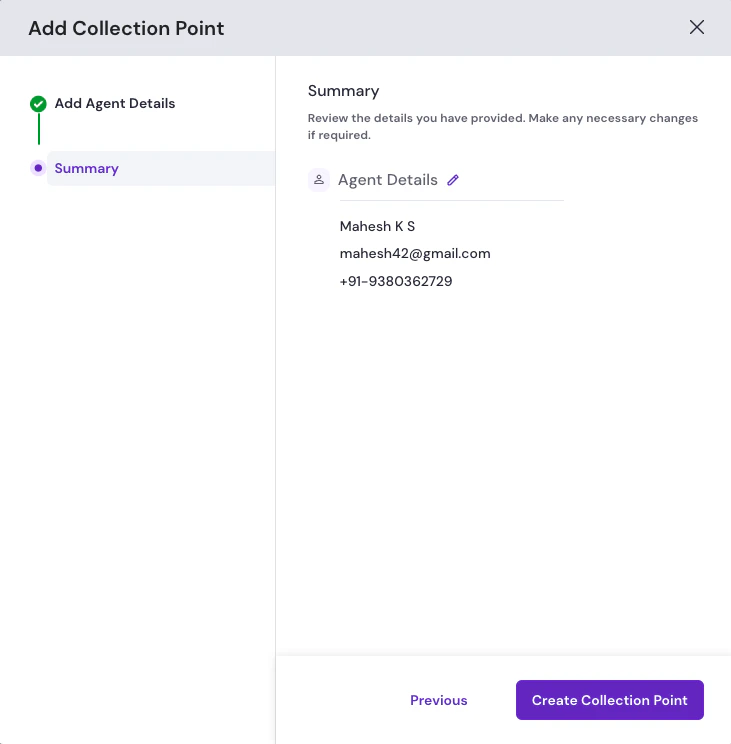
Summary: Review the agent details you have provided. Make any necessary changes to the agent details if required by selecting the edit icon next to the details. Click the Create Collection Point button to submit the details.
Agent KYC verification
After you submit the agent’s details, Cashfree runs the following verification steps:1
Cashfree sends the KYC verification link
An SMS containing a KYC verification link is sent to the agent’s registered mobile number. The link is valid for seven days from the date the agent is added. The SMS reads:“[Company name] has sent an identity verification request for KYC purposes. Click on the [link] to complete the online KYC. The link is valid till [date] - Powered by Cashfree.”
2
Agent completes Aadhaar OTP authentication
The link redirects the agent to an Aadhaar OTP authentication page. Once authentication is complete, the agent’s status moves to Provisionally Active.
3
Cashfree completes KYC review
Once Cashfree reviews and approves the submission, the agent’s status moves to Active. The agent can then download and log in to the softPOS application.
Agent statuses
The following statuses indicate where each agent is in the verification process:If an agent has not received or has misplaced the KYC SMS, you can resend it directly from the Merchant Dashboard.
Customer VPA setup
Customer VPA is not enabled by default. Contact your Cashfree account manager to request activation before proceeding with the steps below.
- Merchant Dashboard
- API
To add and verify a Customer VPA collection point, complete the following steps:
- Log in to the Merchant Dashboard.
- Navigate to PG PRODUCTS > Offline Payments > Collection Point Management.
-
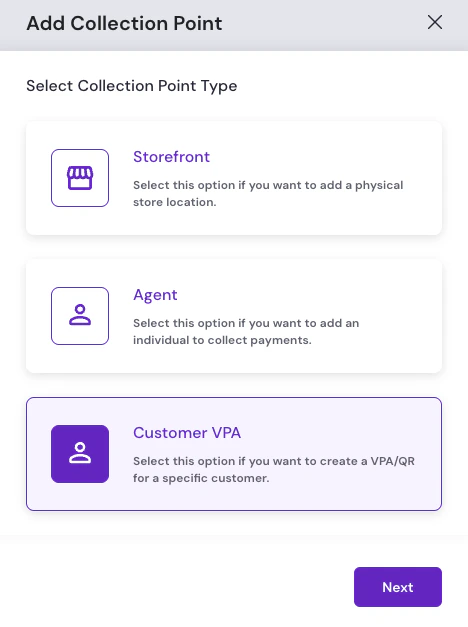
Click Add Collection Point, then select the Customer VPA collection type.
-
On Add Customer Details, provide the following mandatory customer details:
- Customer ID: A unique identifier for the customer (for example,
CUST001). - Customer Name: The customer’s name for this customer ID.
- Customer Phone Number: The customer’s mobile number with country code.
- Customer VPA: If not provided, the VPA defaults to
merchantName.customerId. - Customer Email: The customer’s email address.
- Customer Address: Street, city, state, and pin code for the customer.
Use Upload File on the Add Customer Details screen to upload a batch file and create customer VPAs or QR codes for multiple customers at once.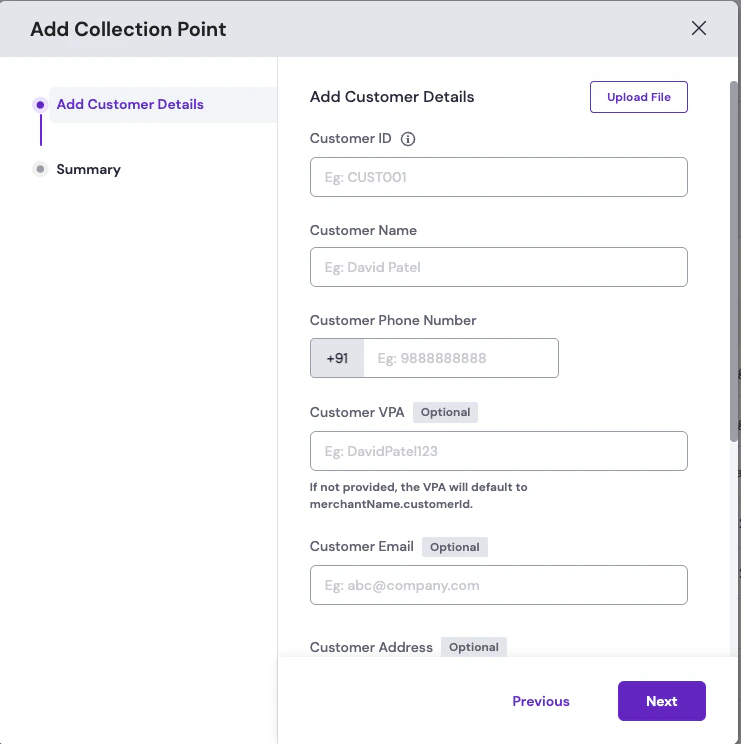
- Customer ID: A unique identifier for the customer (for example,
-
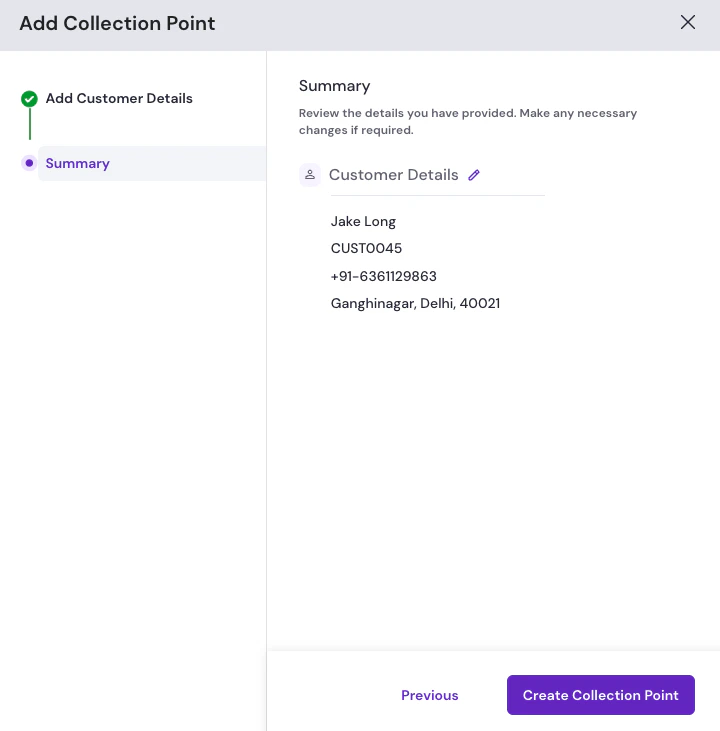
Click Next. On the Summary step, review the customer VPA details. Make any necessary changes by selecting the edit icon next to the details, then click Create Collection Point.