

Use cases
Use a Subscription Payment Form to collect recurring payments through a shared link. The following examples cover both single-plan and multi-plan forms:- Donations: One monthly contribution, or several amounts such as ₹301, ₹500, and ₹1,200.
- Education: A single course fee, or multiple course and coaching plans.
- Memberships and software: One membership, or multiple tiers such as Basic, Pro, and Enterprise.
- Fitness and communities: One membership tier, or several tiers with different benefits and billing frequencies.
How it works
To see how checkout works, compare the two form types:
Each plan you add to the form becomes a separate subscription plan. You configure the subscription type separately for each plan, and set a frequency for each Periodic plan.
Prerequisites
To create a Subscription Payment Form, you need an active Cashfree account. If you don’t have one, sign up for a Cashfree account. You also need:- Access to the Merchant Dashboard.
- The plan name, amount, and subscription type for each plan. Periodic plans also need a billing frequency.
Create a Subscription Payment Form
To create a Subscription Payment Form, follow these steps:1
Open Payment Forms
Log in to the Merchant Dashboard. Go to Payment Gateway > Payment Forms > All.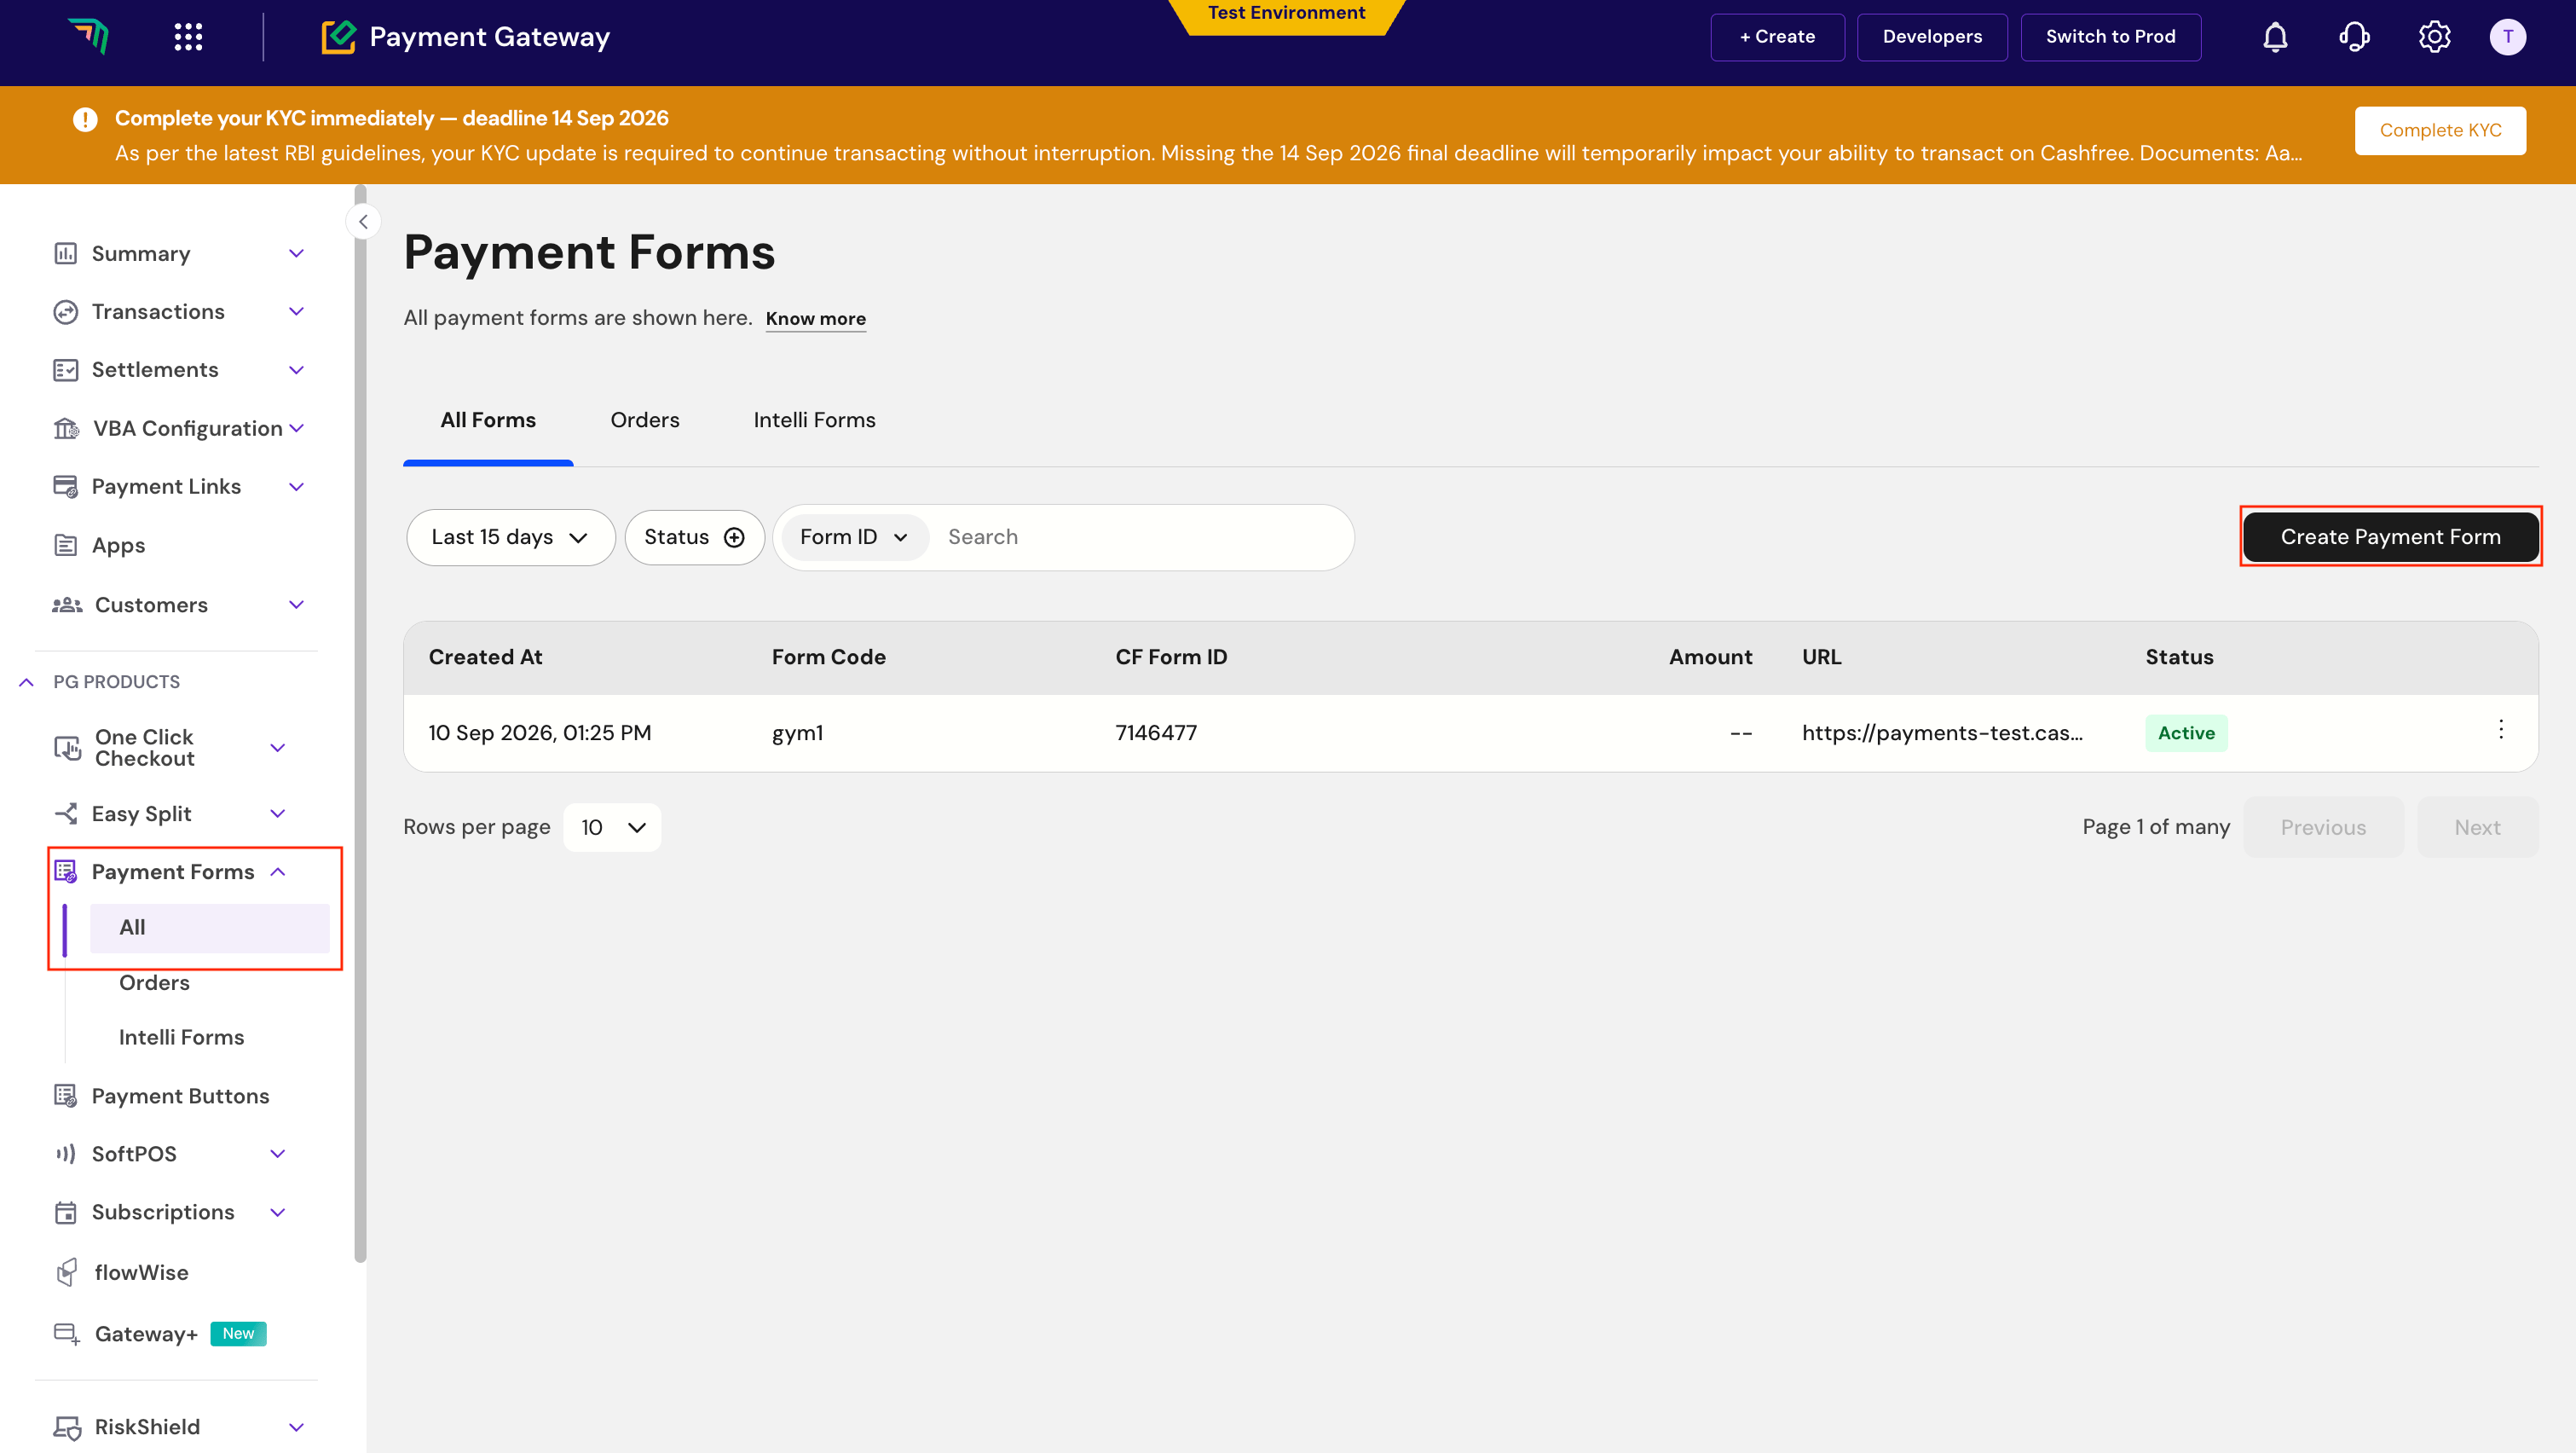
2
Start a new form
Click Create a Payment Form, select Subscription as the payment form type, and enter the form details, such as the form name and purpose of payment.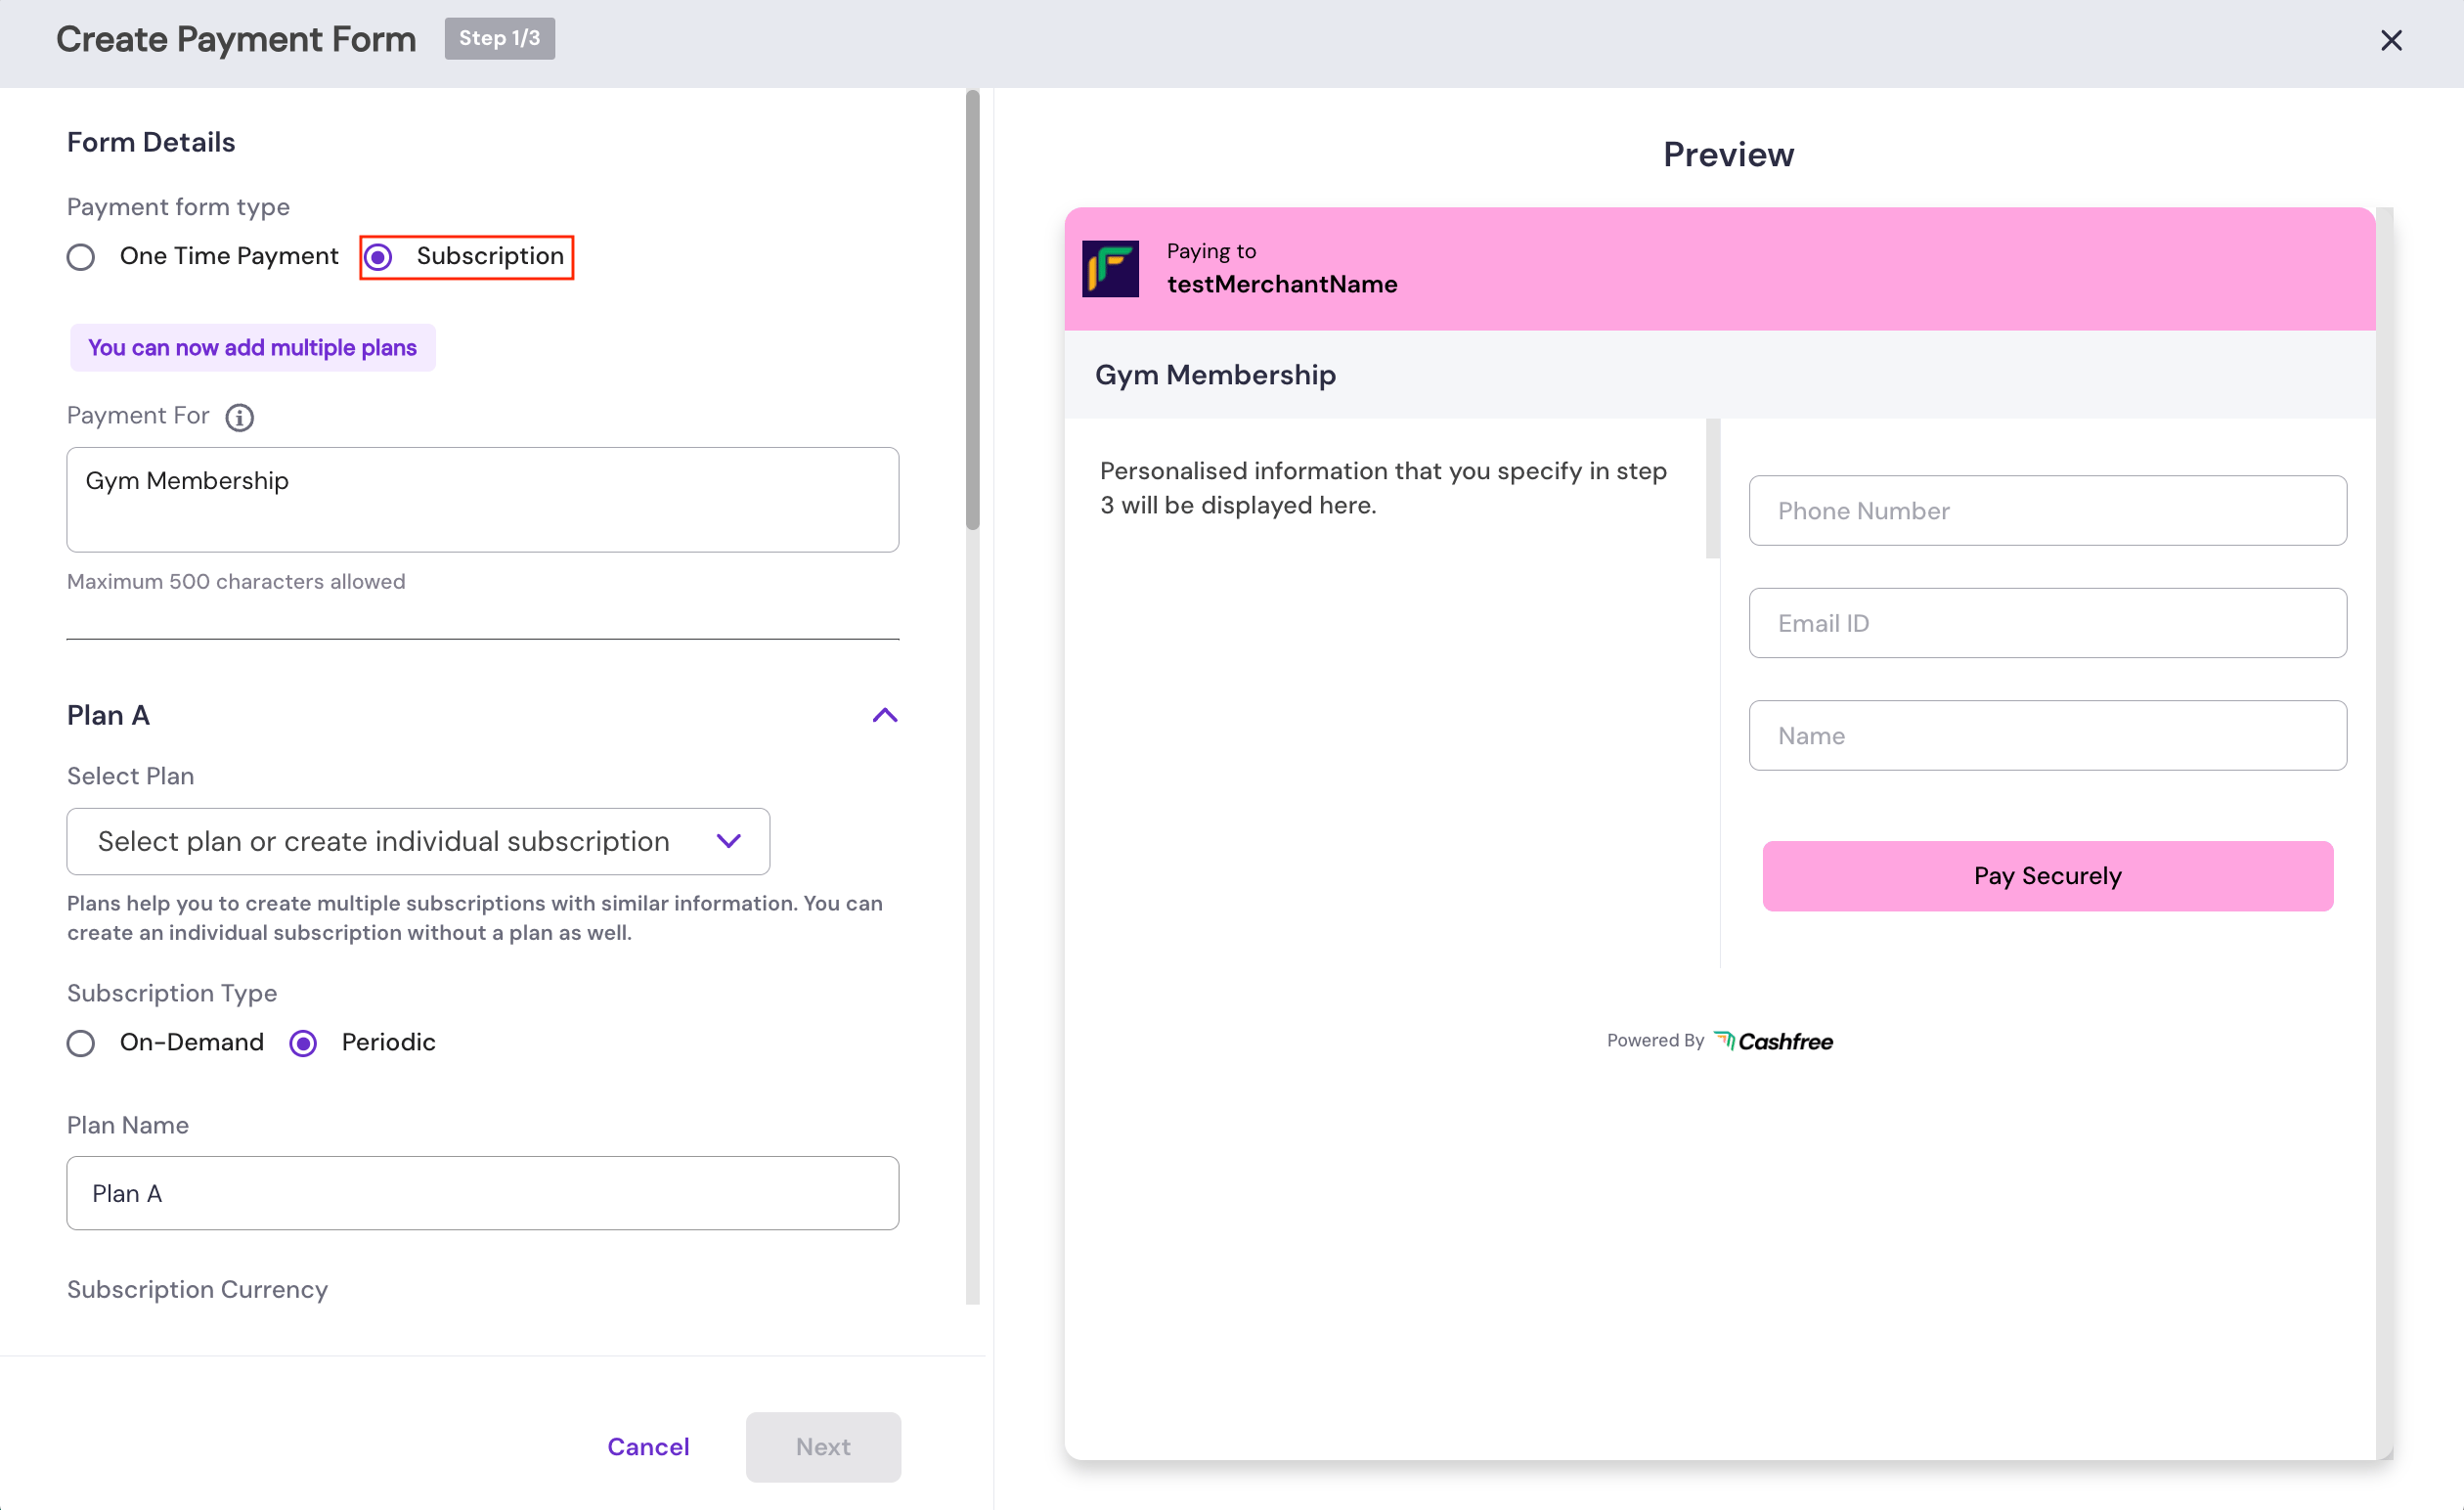
3
Add a plan
Configure each plan with a name, amount, and subscription type, and add a minimum of one subscription plan. Set a frequency only when the subscription type is Periodic.For the frequencies supported by each payment method, see Subscriptions FAQs.
All plans on one form must use the same currency. Plans with the same name or amount are allowed. Periodic plans on the same form can use different frequencies.
4
Add more plans (optional)
Click Add Plan for each extra option you want on the same form. Configure every additional plan with the same fields. You can add as many plans as you need.
5
Review and publish
Edit or delete any plan before you publish. Confirm that every plan uses the same currency, then publish the form and share the URL.
Next steps
To manage subscriptions after customers subscribe, refer to the following topics:- View and manage subscriptions from Manage Subscriptions.
- Charge On-Demand subscriptions after the mandate is active. See charge a subscription.
- Receive subscription updates through subscription webhooks.
Limitations
To avoid unexpected behaviour, note the following limitations:- Customers cannot subscribe to more than one plan in a single checkout.
- Customers cannot switch plans after the subscription is created. Create a new subscription if they need a different plan.